How To Draw A Wasp: In this quick tutorial you’ll learn how to draw a wasp. You can use any image editing software for this, I’m using Microsoft Paint for the example. I want to teach you how to draw the animal Wasp. I think the drawing came out great. The result ended up being a lot different from what I had first concepted. I started it off by sketching some basic shapes to get myself going, which is a lot easier for me as opposed to just diving right in there and drawing straight from my head.
I’m not an artist. So I was surprised when I saw a photo of a realistic wasp. They say that practice makes perfect — so I figured I could draw a wasp too by following these steps. Scroll down to see my results!
Let’s be honest…wasps are some of the most irritating insects on earth, but they’re also some of the most fascinating. They have really specific behaviors and are really known for their unique stingers and stunning patterns throughout their entire bodies. One thing that makes wasps so interesting are the various species. Some of them can actually be a little prettier than bees! This post will give you all sorts of tips on how to draw a wasp in 8 simple steps.
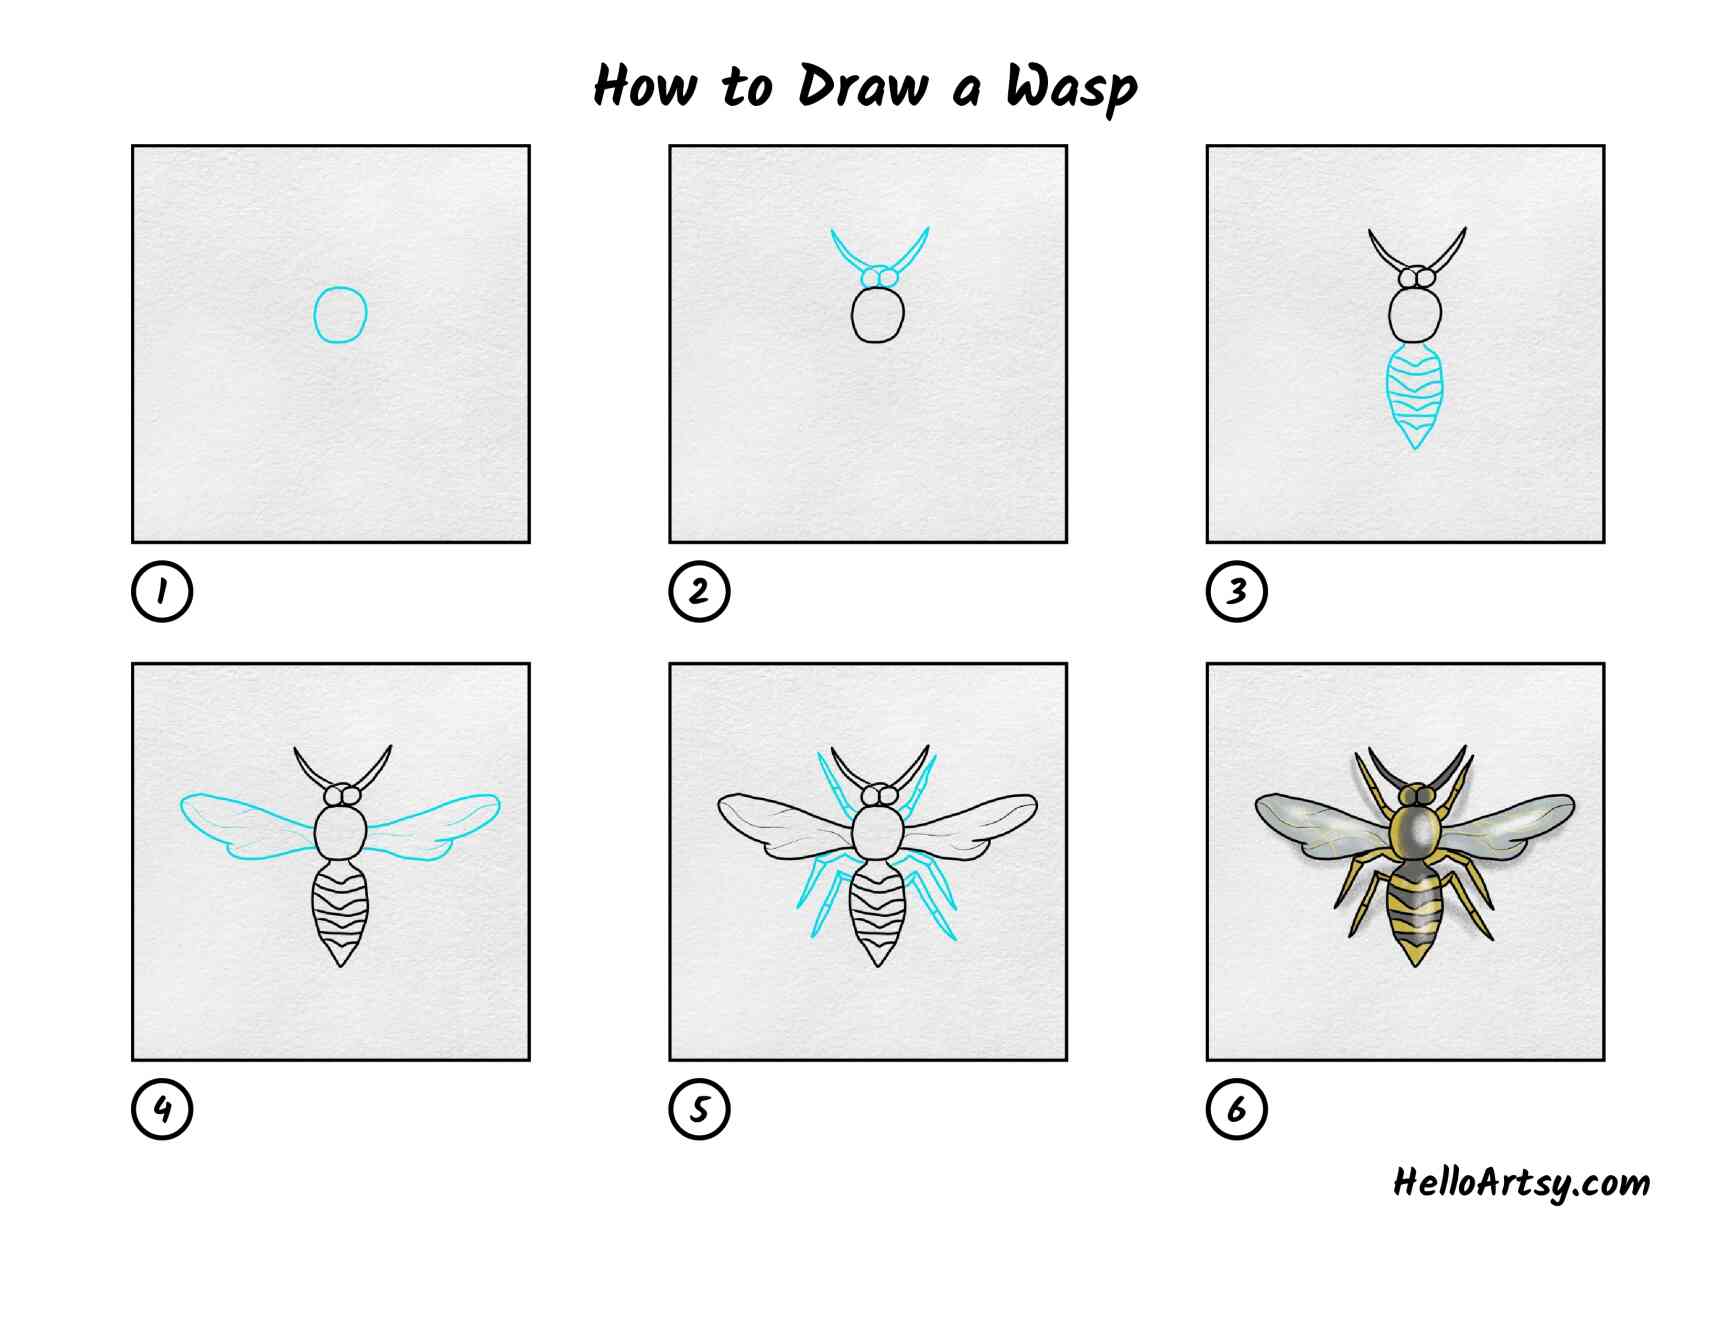
How To Draw A Wasp Step By Step
The wasp is a very beautiful creature. In this article, we will tell you how to draw a wasp.
The first step is to draw an oval-shaped head. Then draw two long antennae on the sides of the head. Then draw two big eyes with small pupils in them. After that, draw a small round mouth under the head and add some teeth inside it. Now add two small circles at the bottom of the head for ears. Finally, make some lines on both sides of the body and add some legs at the end of these lines If you’re looking to learn how to draw a wasp, we’ve got you covered!
This is a pretty straightforward tutorial that will walk you through all of the steps involved in drawing this insect.
You’ll begin by drawing a large oval, which represents the body of the wasp. Next, you’ll add two small circles on either side of this oval that represent the antennae. Then, draw two long rectangles for legs coming out from each side of the oval.
Finally, add two curved lines inside each leg to create a pattern that looks like stripes on a wasp’s abdomen. This is your finished product!
Have you ever seen a wasp? They’re those little bugs that fly around and sting you. They’re not super-cute, but they are pretty cool.
And now you can learn how to draw them! It’s easy. Just follow these steps:
1) Draw a circle for the head of your wasp
2) Draw two circles for the eyes of your wasp
3) Draw two smaller circles for the antennae on its head
4) Draw two lines across this first circle to make antennae stripes!
5) Draw two more lines diagonally across the other circle to make stripes there too! These are wings!
6) Now comes the tricky part: draw a line down from each wing tip, then connect them at an angle in the middle so it looks like an X-Wing fighter with wings! The pointy ends should be facing outwards towards us—this is where it will sting us if we get too close!
List of How To Draw A Wasp Step By Step

Additional Info :
| Item Dimensions | |
| Height | 11 Inches |
| Width | 0.5 Inches |
| Length | 8.5 Inches |
| Weight | 0.5 Pounds |
| Release Date | 2009-11-18T00:00:01Z |

Additional Info :
| Release Date | 2020-11-03T00:00:00.000Z |

Additional Info :
| Item Dimensions | |
| Height | 11 Inches |
| Width | 0.375 Inches |
| Length | 8.5 Inches |
| Weight | 1 Pounds |
| Release Date | 2018-06-05T00:00:01Z |
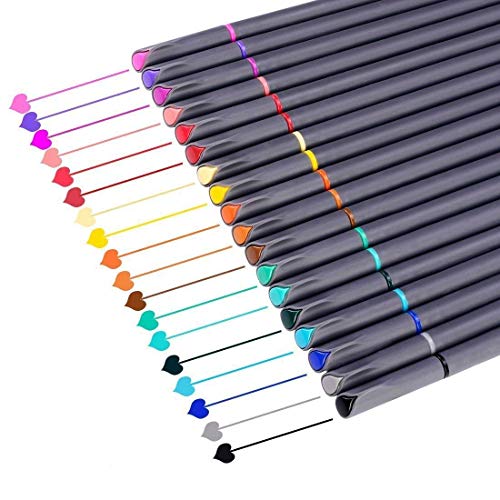
- VIBRANT COLORS Smart Fineliner Color Pens Set 18 Unique Colors, 0.38 mm Fine Point Colored Pens, Assorted Color Fine Tip Marker Pens, Minimal Bleed Thru Ink. Perfect as Journal Pens, Planner Pens, Journaling Pens, Teacher Pens, School Supplies, Office Supplies, Planner Accessories. Premium gift set for the family, friends, co-workers, Birthday, Christmas.
- SMOOTH WRITING Colorful Fine tip marker pen set with superfine, metal-clad fine tipped and outstanding performance in all areas of writing, drawing, coloring, easy and comfortable to write. You will also find them great for home, office, work, business, colleague, church, club, and organazition activities.
- GREAT marker pens for drawing lines & details, journal, planner, calendar, agenda, notebook, note taking, painting, writing, coloring, sketch, marker, signing, manga, animation, graphic, design, illustration, included artists fine-ink drawings and coloring small intricate patterns. Perfect Colored Pens for Middle School, High School, College, Bachelor, Graduate, Women, Men, Adult Coloring.
- Colored art writing drawing porous point pens. Water-based ink, minimal bleed thru (except very thin paper), these fiber-tipped pens create fine lines and intense water-based colors. Packaged in a soft transparent vinyl bag.
- WELL PACKAGE — Our fine line pens come in a nice plastic storage case with fold over snap closure which can be easily placed in backpacks. For using in school, travel or used in the home and office. Great Back to School Stationary, planner or journaling supplies for Christmas, Birthday, Mother’s Day, Easter Day, Valentine’s Day, Thanksgiving Day, Party, New Year’s.
Additional Info :
| Color | Black, Grey, Red, Blue, Magenta, Pink, Purple, Violet, Pale Yellow, Yellow, Orange, Raw Sienna, Sap Green, C Green, O Green, Lake Blue, Burnt Sienna, Crimson |
| Item Dimensions | |
| Height | 0.6 Inches |
| Width | 6.2 Inches |
| Length | 6.6 Inches |
| Weight | 0.24 Pounds |

- EXTENDED WIRELESS COVERAGE: Adds Wi-Fi range coverage up to 1000 sq ft, and connects up to 15 devices such as laptops, smartphones, speakers, IP cameras, tablets, IoT devices, and more.
- AC750 WI-FI SPEED: Provides up to 750Mbps performance using dual-band and patented FastLane(TM) technology.
- UNIVERSAL COMPATIBILITY: Works with any wireless router, gateway, or cable modem with Wi-Fi.
- WIRED ETHERNET PORT: Simply plug in game consoles, streaming players, or other nearby wired devices using the one 10/100M port for maximum speed.
- SAFE & SECURE: Supports WEP and WPA/WPA2 wireless security protocols.
- SIMPLE TO SETUP: Press the WPS button to connect to your router. Use the NETGEAR WiFi Analyzer app for optimal location.
Additional Info :
| Color | White |
| Item Dimensions | |
| Height | 2.17 Inches |
| Width | 1.54 Inches |
| Length | 2.64 Inches |
| Weight | 0.6 Pounds |
| Release Date | 2015-07-07T00:00:01Z |