
Garage Door Brush Seal Roll‑Up Kit – 4 Sets
Original price was: $39.99.$37.99Current price is: $37.99.
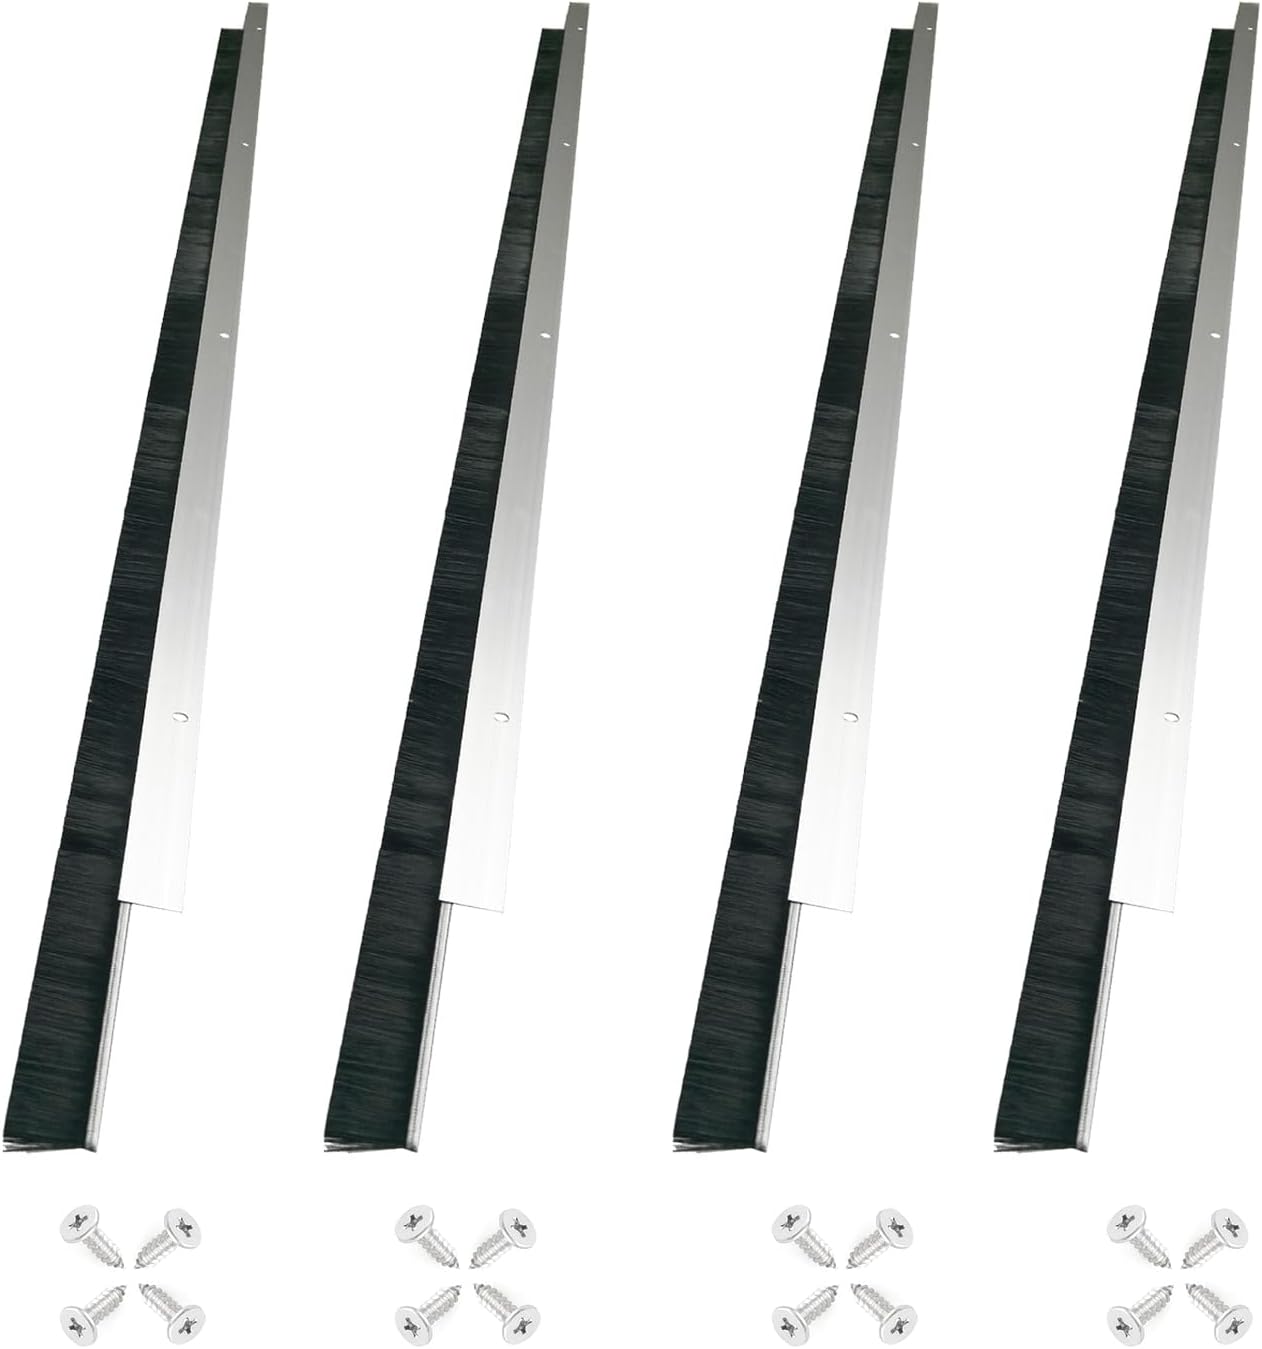
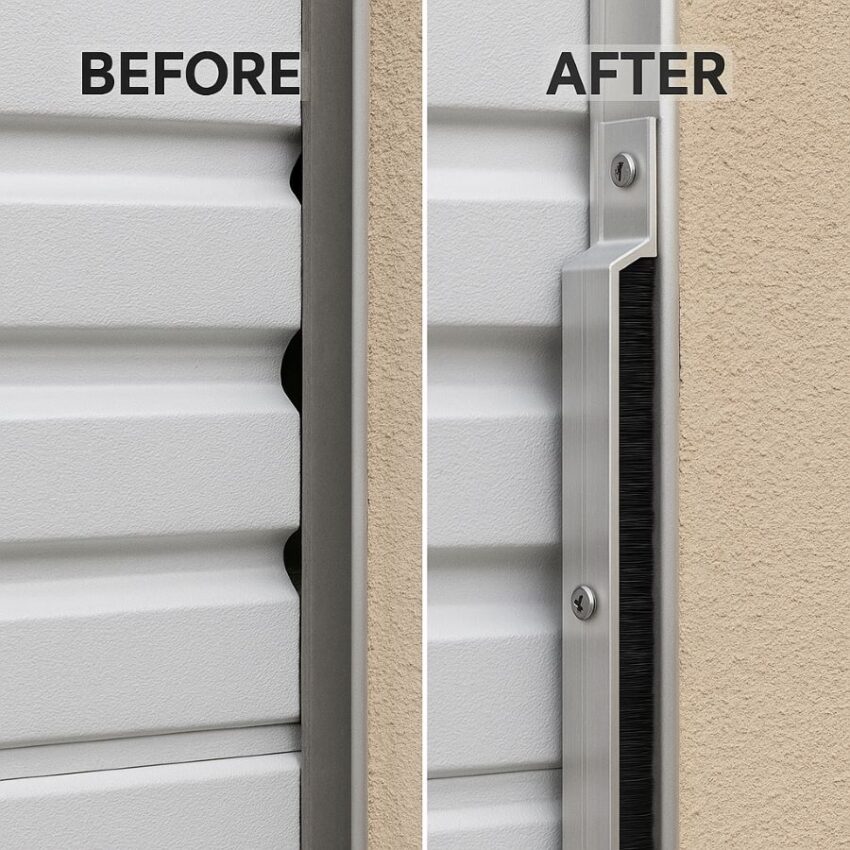
This 4‑set garage door brush seal kit delivers exactly what you need: four ultra-flexible brush strips (0.98″ × 39.37″) in aluminum holders, plus screws for fast, fuss-free mounting. Designed to squeeze into uneven gaps around roll‑up doors, it keeps out drafts, dust, pests, and wind-driven debris with reliable performance. It’s the kind of straightforward, long-lasting upgrade that feels like a thoughtful fix; cleaner garage, calmer climate, fewer surprises. Durable, easy to install, and built to last.
Description
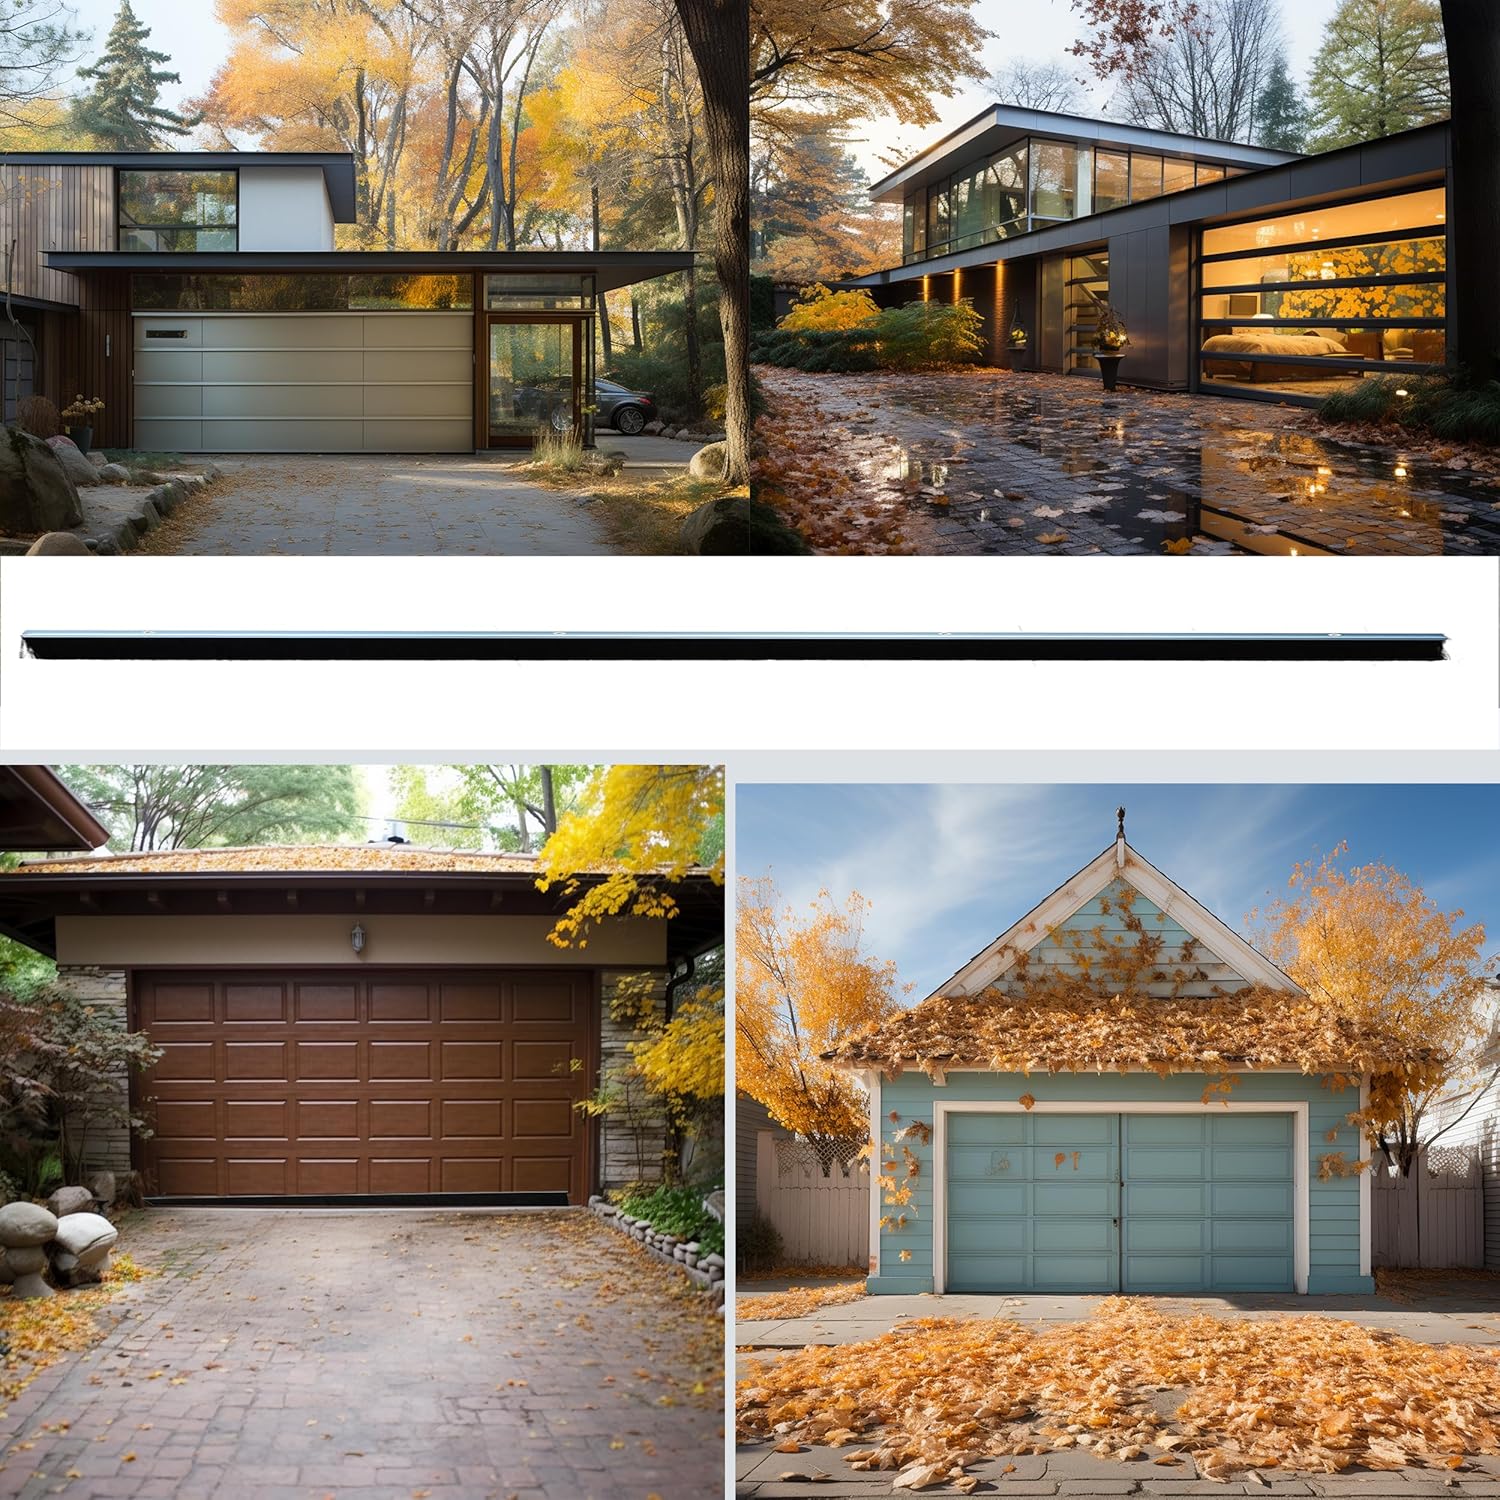
Imagine this: a persistent draft slipping under your roll‑up garage door or dust swirling inside every time it slides open. That’s exactly what the Garage Door Brush Seal Roll‑Up Kit, 4 Sets is made to fix. It’s not just hardware; it’s the kind of thoughtful upgrade that silently stops nuisances and brings back comfort and order. Carefully crafted and easy to fit, this brush seal makes your garage feel more like a protected space, not a welcome mat for dirt, pests, or the wind.
Key Customer Benefits
- Nearly eliminates air leaks (up to 99 %): brush seals stop almost all airflow through gaps, outperforming vinyl and foam weather seals by up to three times.
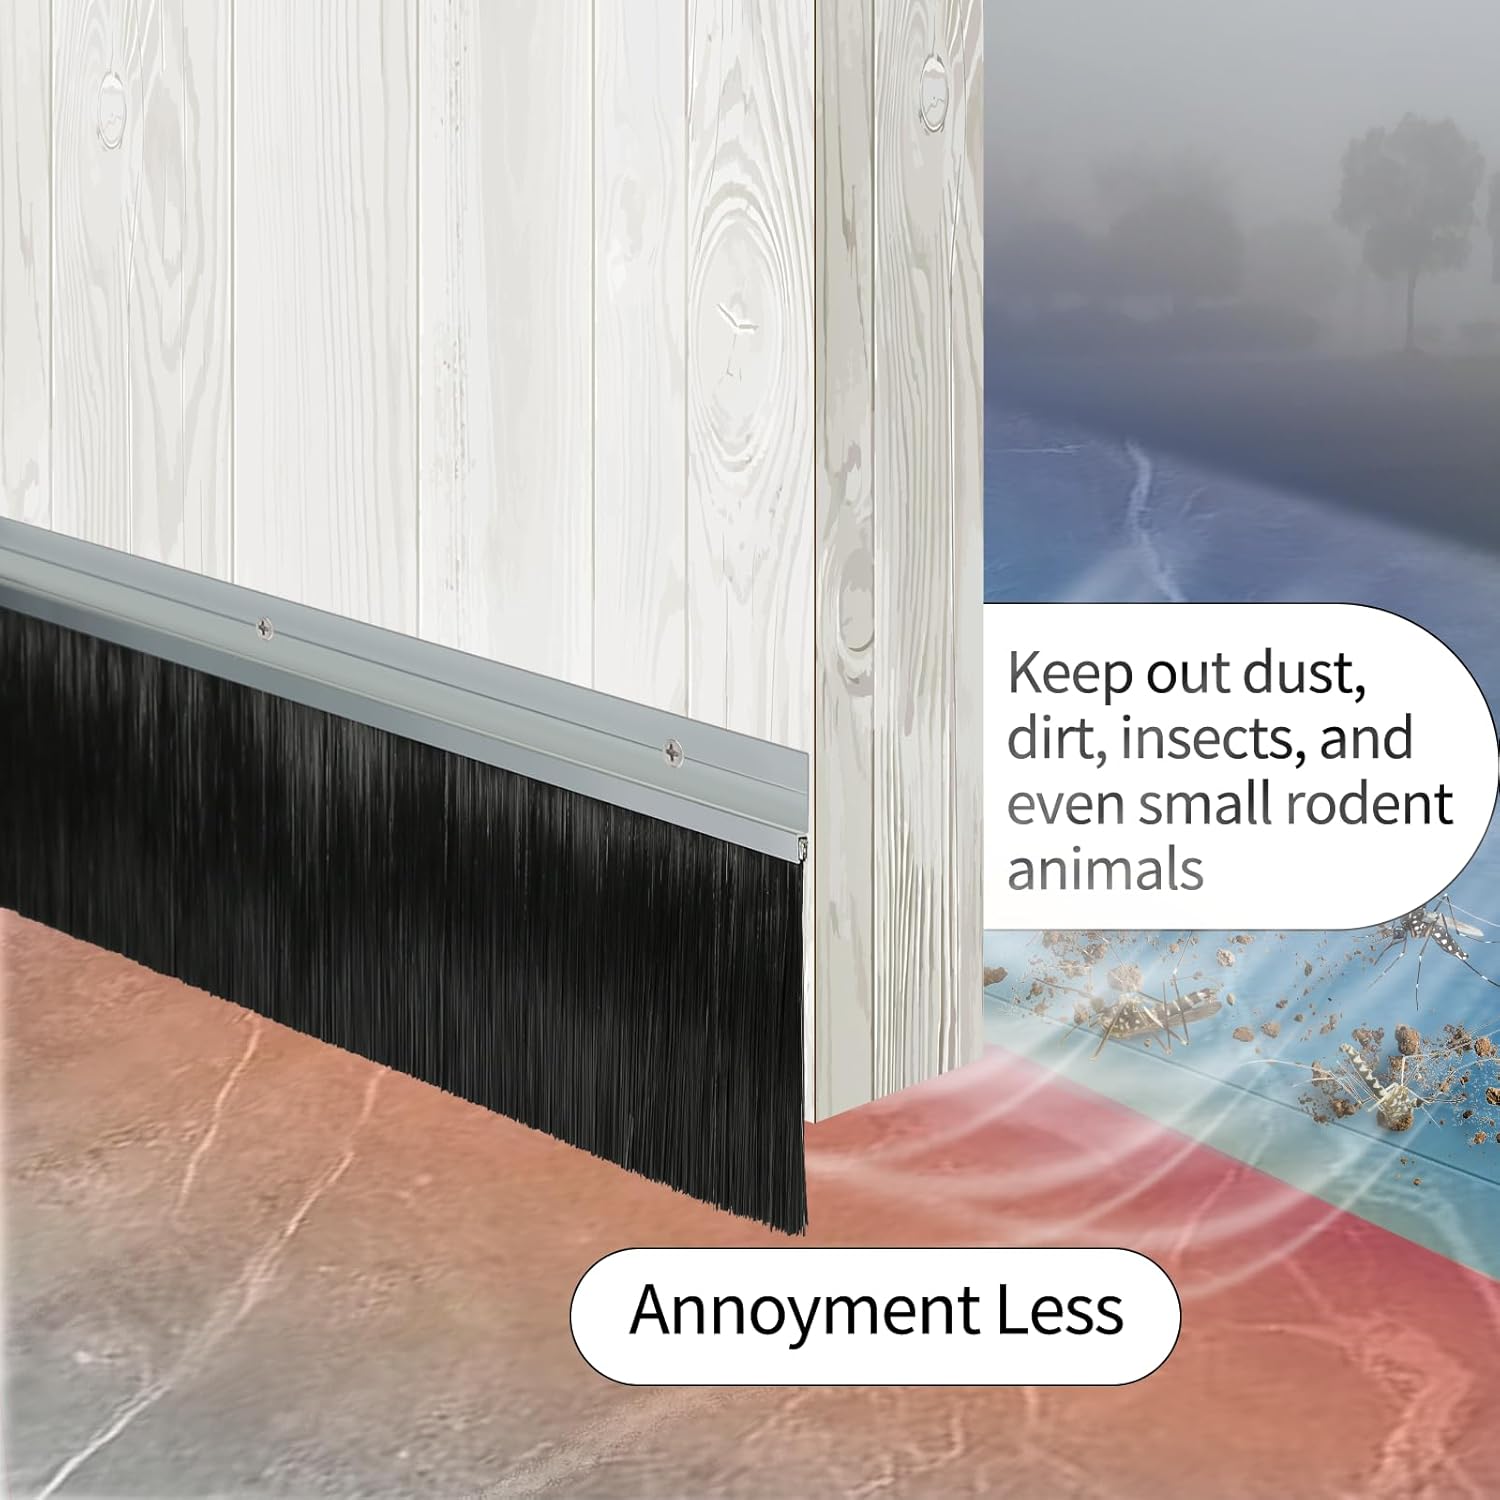
- Keeps dust, debris, and pests out, especially in windy or dusty areas; the dense bristles conform to uneven surfaces and stop grit and critters from sneaking inside.
- Improves energy efficiency and temperature stability by blocking drafts; helps reduce heating or cooling loss and keeps things comfortable all year round.
- Reduces noise transfer when the door closes and softens echoes inside the space; handy if your garage is also your workspace or man‑cave.
- Built for irregular roll‑up or ribbed doors: the brush bristles flex to fill corrugated tracks and uneven surfaces much better than rigid seals.
- Durable and low‑maintenance: no stretching, curling or cracking like rubber. And a light vacuum every few months keeps it working well over years.
- Fast, easy DIY install: just measure, cut, and screw in. Aluminum retainer and included screws make fit‑up simple, even if you’re not a pro.
Product Description
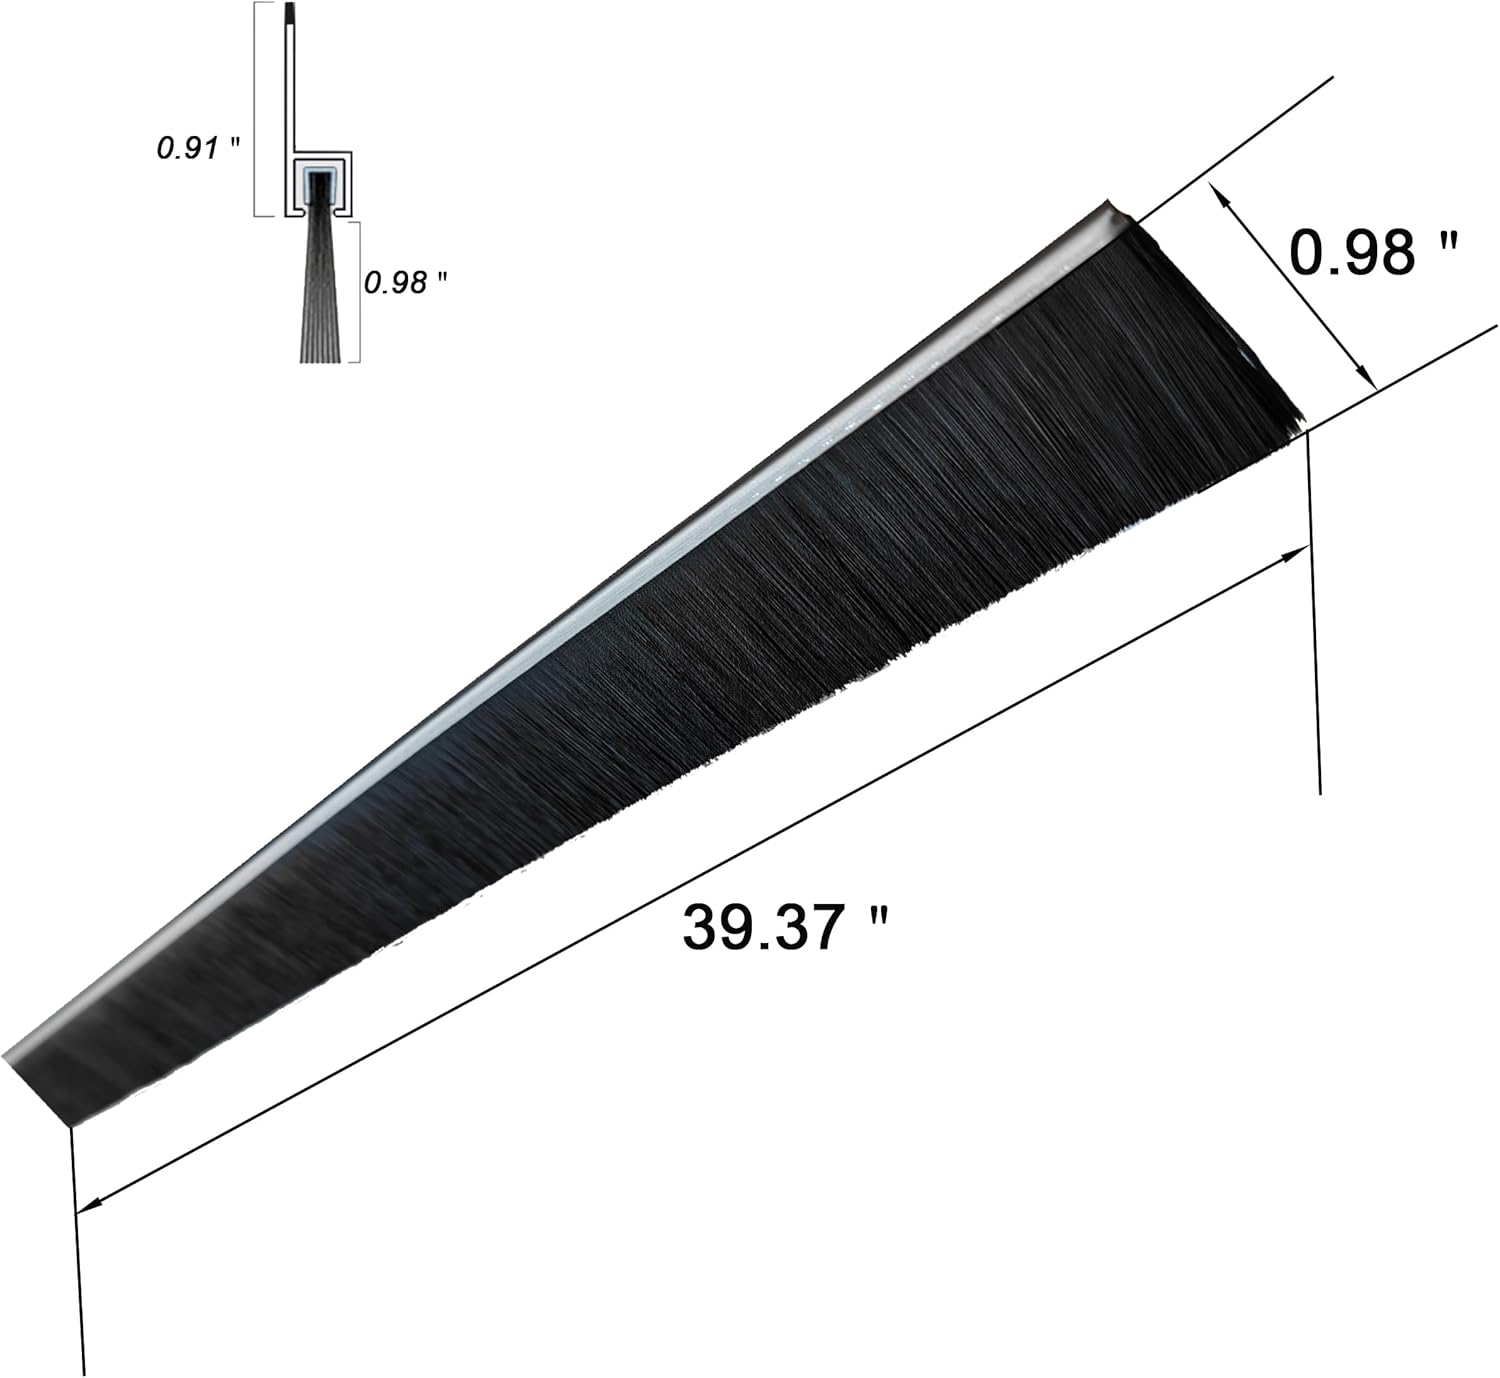
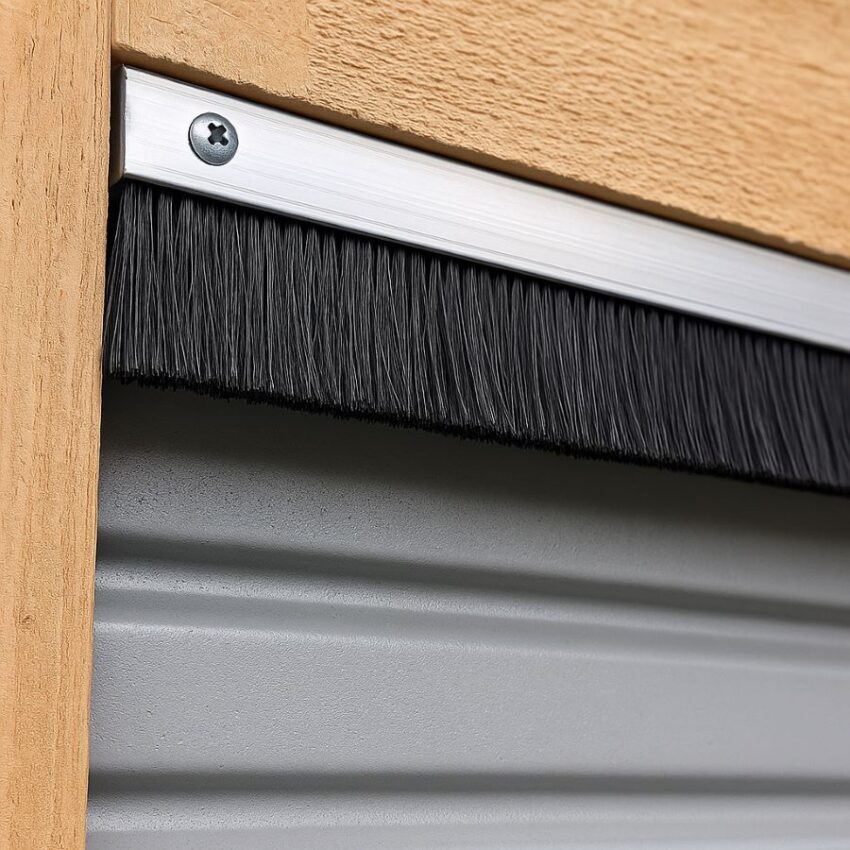
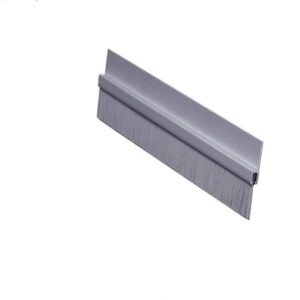
This kit isn’t just a list of dimensions; it’s a practical solution thoughtfully engineered for roll‑up garage doors. Each set includes a brush strip about 0.98 in tall and 39.37 in long, mounted in an aluminum holder. The brush has densely packed polypropylene bristles twisted around a steel core, built to flex against irregular surfaces and resist moisture. It fits across the top and sides of corrugated or ribbed roll‑up doors, flexing into grooves to maintain a seal even in uneven frames.
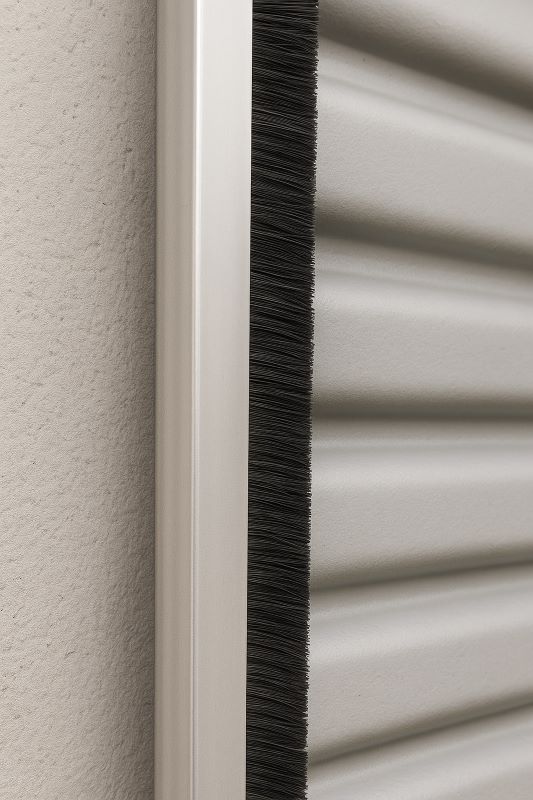
You mount it by aligning the aluminum channel near the door frame, trimming where needed, then fastening it with screws spaced every 6–8 in. It doesn’t rely on adhesives or compression, bristles maintain contact with whatever they touch. Brush seals handle gaps better than vinyl or rubber, especially when the seal shape isn’t uniform.
What makes this kit standout is the quality of materials and installation design. The polypropylene filaments resist freezing, warping, or water retention and the steel core ensures the brush structure holds firm. Unlike vinyl flaps that curl or degrade over time, tight brush filaments maintain consistent contact. Top-rated providers note that brush seals stop up to 99 % of air infiltration and outperform vinyl seals by a factor of up to three.
Customer Story: Jordan’s Workshop
Jordan, a woodworker, battled dusty fibers, drafts, and even tiny pests sneaking into his workshop through his roll‑up door. He mounted this brush seal kit across the top and both sides, cutting and installing in under 30 minutes. Since then, the space stays cleaner and more temperature‑stable. He’s noted that dust no longer settles when the wind blows; instead, air passes over the brush tips and stays outside. The peace of mind was worth the small investment.
Seen forums like r/HomeImprovement, users say brush seals really shine at filling inconsistencies in tracks or panels. One homeowner wrote:
“Brush seals work best on corrugated roll ups or deep ribbed sectional doors as they conform to irregular surfaces better.”
Another chimed in when comparing brush vs rubber:
“Brushes can be effective on a small gap… It seems… brush seals would be the best way to seal up the gaps between the door panels and the entire opening frame.”
Product Specifications
| Specification | Details |
|---|---|
| Kit Includes | 4 brush strips, 4 aluminum retainers, and 16 screws |
| Brush Height | 0.98 in (≈ 25 mm) plus spine width ~0.91 in (≈ 23 mm), total clearance ~1.15 in |
| Strip Length | 39.37 in (1 m) per brush strip |
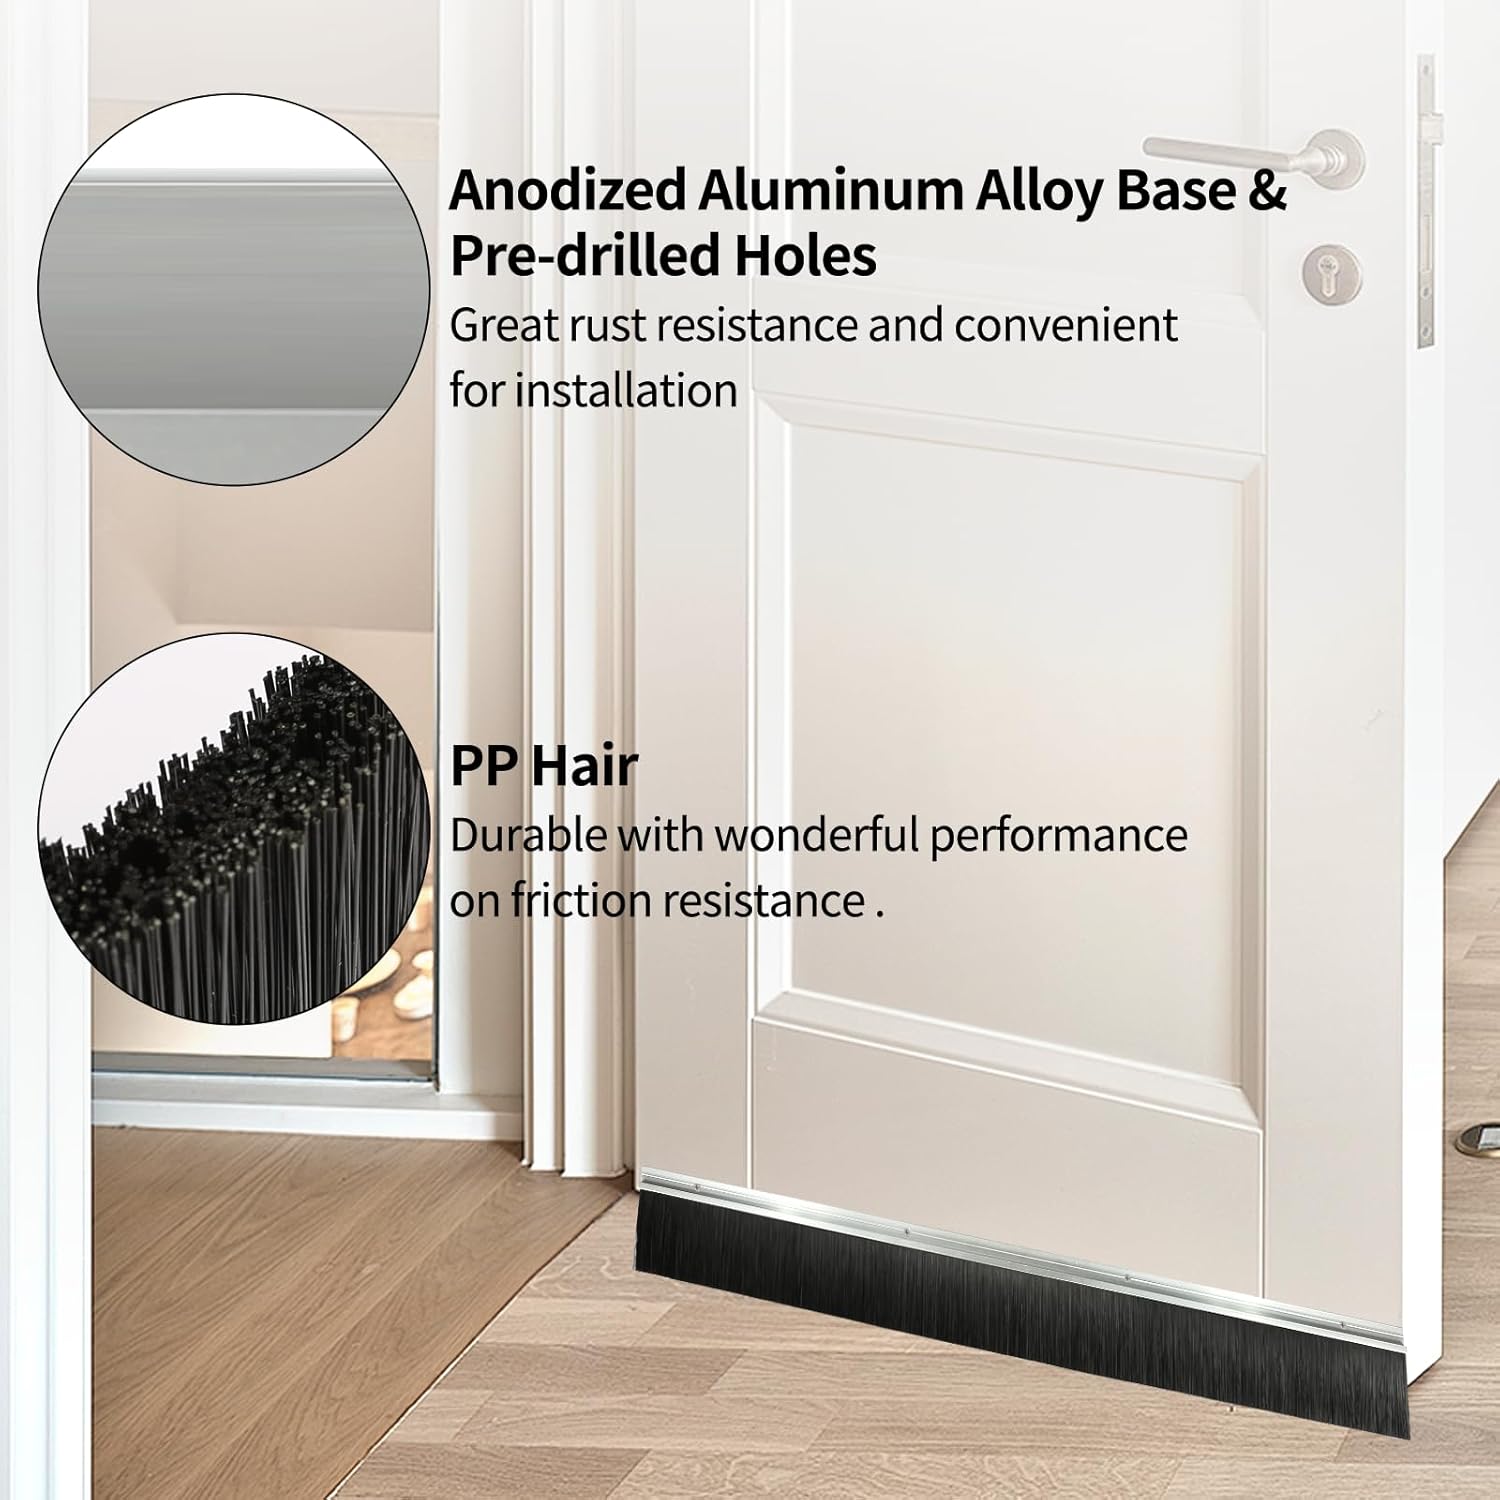
| Materials – Bristles | Polypropylene (black PP hair), high density, resistant to moisture and temperature shifts |
| Core | Steel core inside each brush filament for rigidity and shape retention |
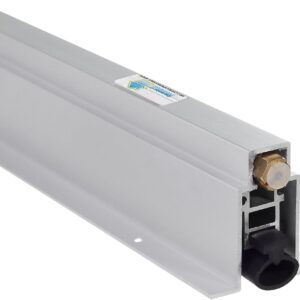
| Retainer Material | 6063‑grade aluminum alloy housing (straight profile) |
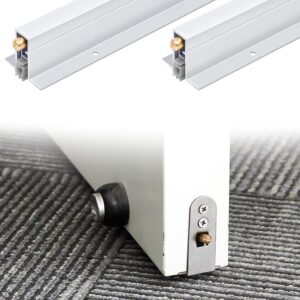
| Screws Included | SUS304 stainless‑steel or zinc‑coated screws (4 per strip) |
| Max Gap Sealed | Up to ~1.15 in between door surface and frame for effective seal |
| Coverage | Total ~157 in (≈ 4 m) of brush length across kit, enough for top + both sides of medium roll‑up door |
| Installation Method | Screw‑in (no adhesive), easy DIY; cut-to-fit strips with pilot holes for hard materials |
| Weight (approx.) | ~2.44 lb per 5‑strip kit (so around 1.95 lb for this 4‑strip kit) |
| Origin & Certification | Retsun brand; quality control per MIL‑105‑E standards; non‑toxic PP, corrosion‑resistant housing and fasteners |
How to Use / Installation Guide
Tools You’ll Need
- #2 Phillips screwdriver or drill with phillips bit
- Hack saw or metal‑cutting blade
- Wire cutters or scissors
- Pencil or marker
- Tape measure
- Ladder or step stool
Step 1: Lay It All Out
Unpack the kit and lay each brush strip, aluminum retainer, and screw on a flat surface. Decide which piece will go along the top/header of your door and which two are for the sides. Mark each set clearly so you stay organized as you go.
Step 2: Remove Old Seals
If your door already has foam, rubber, or worn brush weather‑stripping, carefully remove it. Clean the mounting areas so you have a smooth surface for the new channels.
Step 3: Measure and Mark
For the header strip: measure the exact width of your door frame and mark that length on both the retainer channel and bristle.
For the side pieces: measure from the top strip down to the threshold, then do the same marking. It’s better to cut slightly too long then trim than too short.
Step 4: Trim to Fit
Use your hacksaw to cut the aluminum channel. When trimming the brush, pinch the cut ends closed (with wire cutters or pliers) so bristles don’t come loose. Some kits require crimping or peening the ends of the holder to secure the filaments, check your kit’s instructions if that applies.
Step 5: Dry‑Fit and Mark Holes
Hold each piece in place (header first, then sides), ensuring the brush bristles just touch the door when closed. Use the pre‑drilled holes in the aluminum channel to pencil‑mark where to screw it in. If your mounting material is hard wood or metal, consider drilling pilot holes, typically with a 7/64″ bit, before fastening.
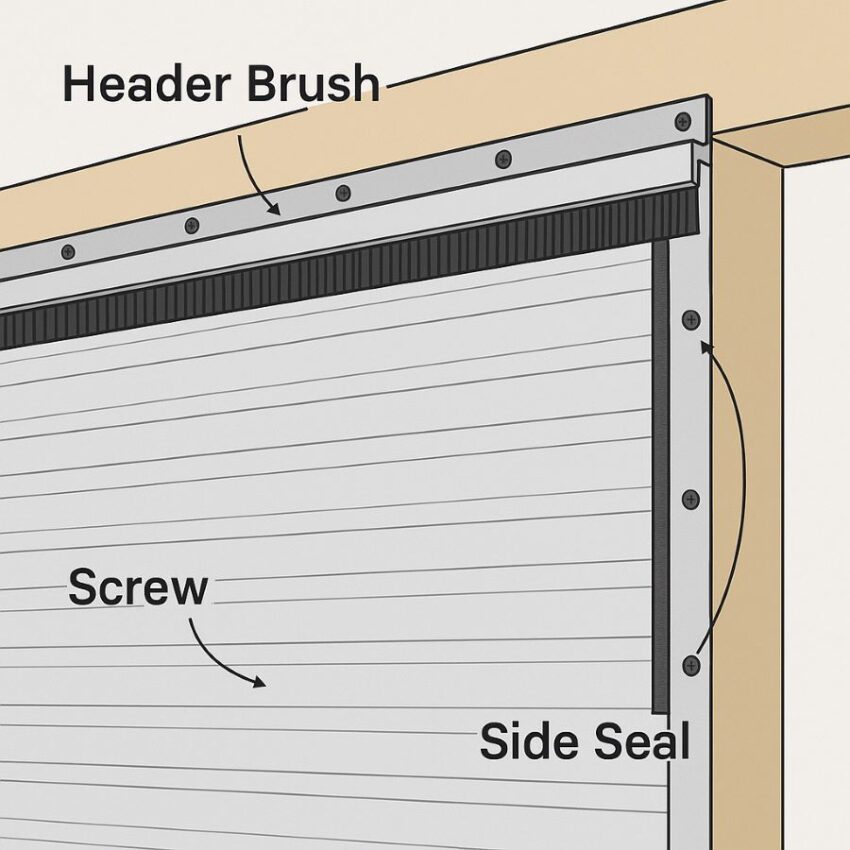
Step 6: Install Header Strip First
Position the top (header) brush seal channel evenly across the width, then secure it with included screws every 6–8 inches. Don’t over‑tighten; tighten just enough for a secure, flush fit.
Step 7: Install Side Pieces
With the header secure, fit the two side strips. Align them snugly to the header corners with no gaps. Screw them in the marked positions. Strips should flex slightly, but not bind, behind the door when it moves.
Step 8: Test Clearance
Open and close the garage door slowly. Watch how the bristles glide, there should be smooth contact without catches or bunching. If you see snagging, loosen a screw or trim stray bristles for smoother motion.
Step 9: Final Adjustments & Maintenance
- Trim any protruding fibers that catch or obstruct the path of the moving door.
- Every few months, or after heavy weather, lightly vacuum or brush off dust and debris from the brush.
- Inspect screws annually or following storms, tighten or replace if corroded (especially in high‑humidity or coastal areas).
- If aligning two strips (for larger doors), stagger joints where brush meets holder channels for a tight seal and tidy overlap.
Extra Tips from DIY Enthusiasts
Reddit contributors on r/AusRenovation strongly recommended mounting brush seals inside the door frame, not outside, to prolong durability, exposure to weather can compromise adhesive or fasteners over time. If adhesive is needed, let it set before using the door. In most installations, though, screws alone provide sufficient hold.
Troubleshooting Common Issues
- Brush wiggles or droplets protrude? Loosen screws slightly and reposition so bristles compress just enough.
- Door sticks or slows closing? Trim a few fiber tips where needed until the motion is smooth.
- Two pieces leave a tiny gap? Overlap brackets slightly or stagger them for better sealing.
FAQs
1. How often should I replace a brush seal?
Most sources recommend quitting while the seal still works, meaning replace approximately every 1 to 2 years in high-use or harsh environments, and up to 5‑10 years in milder conditions with proper care. According to Tanis Brush, typical lifespan is 1–2 years depending on use and climate. Others like GaraDry and JA Seals note that durable weather seals, or well-maintained brush seals, can last up to 10 years. Seasonal checks help you act before gaps form.
2. Will installing a brush seal really cut my energy bills?
A: Yes. Brush seals reduce unwanted airflow around roll‑up doors, improving temperature control. According to Memo Industries and membrane seal specialists, they dramatically lower infiltration and help HVAC systems work less hard. GaraDry adds that up to 20‑30 % of heat loss through an attached garage can be reduced by sealing the door properly.
3. Are brush seals more effective than vinyl seals?
A: In sealing uneven or corrugated surfaces, brush seals are typically 3× more effective at blocking air leaks than vinyl strips. They flex to fill gaps and resist freezing or curling, while vinyl flaps can warp or detach.
4. What are signs a seal needs replacing?
A: Replace brushes or seals if you spot any of the following:
- Visible gaps or leaks letting air, dust, or moisture through
- Bristles thinning, breaking off, or curling
- Drafts at the edges or feeling airflow when door is closed
- Water stains, mold, or increased pest activity
Experts advise inspecting seals every 6 to 12 months for wear, brittleness, or shifting; especially after storms or temperature swings.
5. Inside or outside frame installation, does it matter?
A: Inside-frame installs usually last longer. Mounting the channel inside the door frame shields it from abrasion and direct weather exposure. Many DIYers and trade forums recommend adhesive plus screws inside as a smart, durable choice.
6. Do brush seals handle moisture and rain effectively?
A: They’re water-resistant, bristles don’t soak up moisture and dry quickly, but they aren’t watertight barriers. In heavy rain, some water may pass through bristle tops. For optimal protection, users often pair brush seals with a separate rubber drip-edge above the door.
7. Can brush seals scratch the door surface?
A: It’s uncommon, but if bristles rub directly against a steel or painted surface, minor scuffing can occur. Installing the brush inside the frame rather than on the face helps prevent this risk.
Quick Recap
- Replace brush seals every 1–2 years in heavy use or harsh climate; up to 5–10 years in milder, well-maintained conditions
- Proper sealing can reduce energy costs by 20‑30% for attached garages
- Bristle-style seals outperform vinyl on uneven or ribbed door surfaces
- Inspect seals every 6–12 months for breaks, gaps, or air leaks
- Inside-frame installation extends lifespan
- Water resistance is good, but add rubber edge for full waterproofing
- Brush seals rarely scratch surfaces if installed correctly
Conclusion
You’ve walked through the full story of this seal kit, from set-up and real-life wins to care tips and energy savings. Here’s why Garage Door Brush Seal Roll‑Up Kit is a smart upgrade, not just hardware:
- It’s trusted by industry and pro suppliers; brush seals block up to 99% of airflow, outperforming vinyl strips by a factor of three, even on ribbed or corrugated roll‑up doors.
- It guards against dust, bugs, and wind-driven debris and gives you cleaner, quieter space while bolstering insulation and helping reduce HVAC work.
- The materials (polypropylene bristles wrapped on steel cores, in aluminum retainers) resist moisture, temperature shifts, and aging.
When you’re ready to wrap up that install and enjoy a cleaner, calmer space, this kit is your go-to. One kit covers a medium-sized door’s top and both sides. Need to seal a second door or a deeper gap? Just grab another kit and repeat the install, it’s that straightforward.
Related products
-

TMS Automatic Door Bottom Seal, Fully Mortised 36 inch, 1 inch Drop Neoprene Bulb
$84.99 Buy Now -
Sale!
Extra-Wide 3″ Door Draft Stopper, 39″ Adjustable Seal for Large Gaps
Original price was: $14.99.$9.99Current price is: $9.99. Buy Now -
Pemko 36″ Aluminum Brush Door Sweep with Gray Nylon Brush
$20.39 Buy Now -
2-Strip Aluminum Automatic Door Bottom, 36-inch Surface-Mount Drop Seal
$69.99 Buy Now

Reviews
There are no reviews yet.