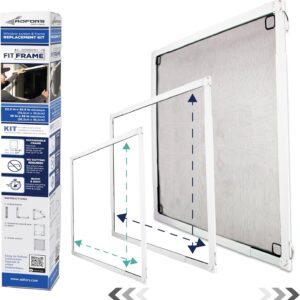
White 5/16 in Aluminum Screen Frame Kit, 48 x 48 – M-D Building Products 14103
$25.25
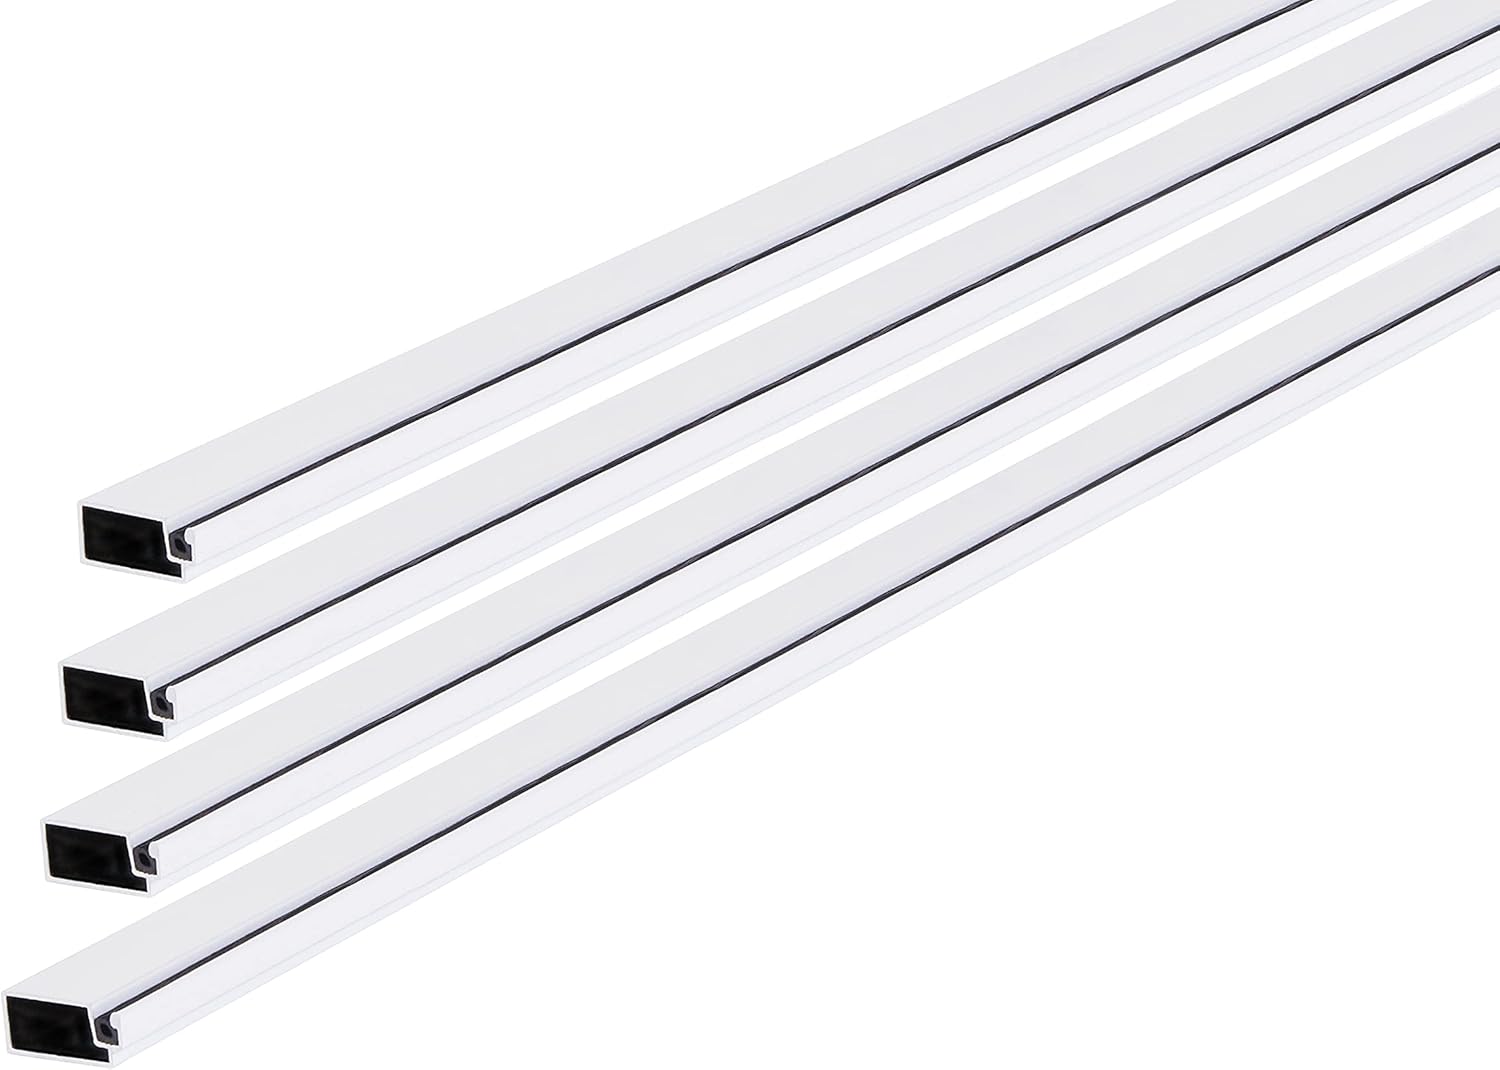
Let the breeze in and keep mosquitoes out with the White 5/16 in Aluminum Screen Frame Kit, 48 x 48 – M-D Building Products 14103. You get four cut-to-fit aluminum rails plus corners, spline, pull tabs, and side tension springs to build one sturdy screen that drops cleanly into a 5/16 inch track. Mesh is sold separately, and the maker notes you may need a different spline size depending on the fabric, which helps you get a snug, rattle-free seal. It is a simple, durable fix that aligns with public health guidance to repair or install window screens to reduce indoor mosquito bites.
Description
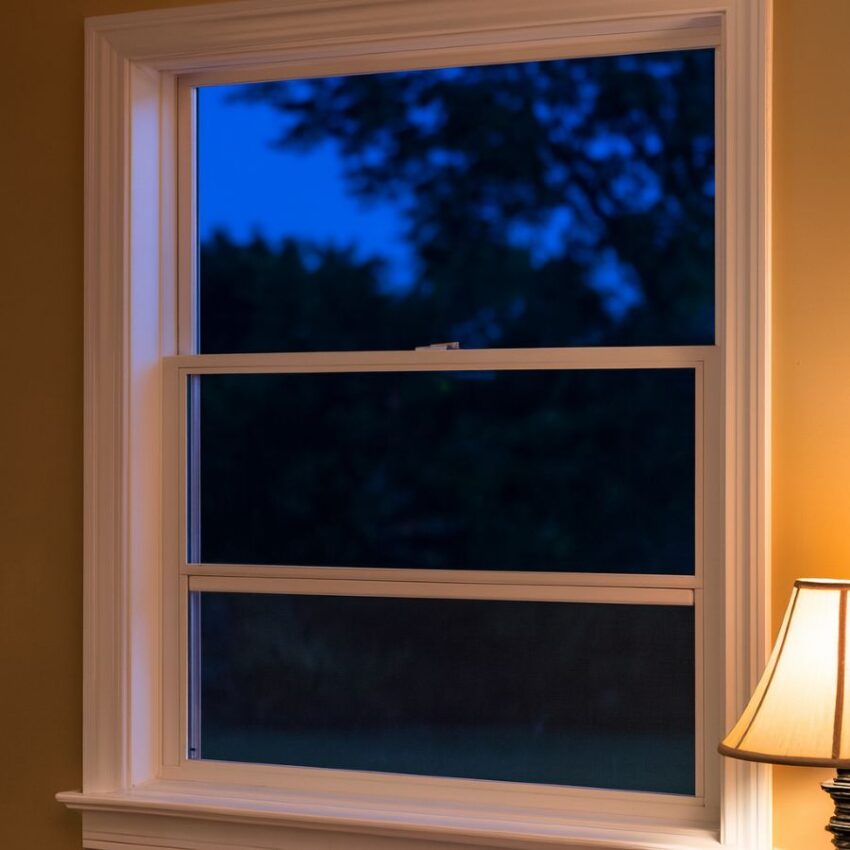
If mosquitoes are turning your evening breeze into a battle, the M-D Building Products 14103 5/16 in. x 48 in. x 48 in. White Aluminum Screen Frame Kit is the clean, simple fix that lets fresh air in while keeping biting pests out. Public health guidance is clear. The CDC specifically recommends using and repairing window screens to keep mosquitoes outdoors, which is one of the fastest ways to cut indoor bites without chemicals.
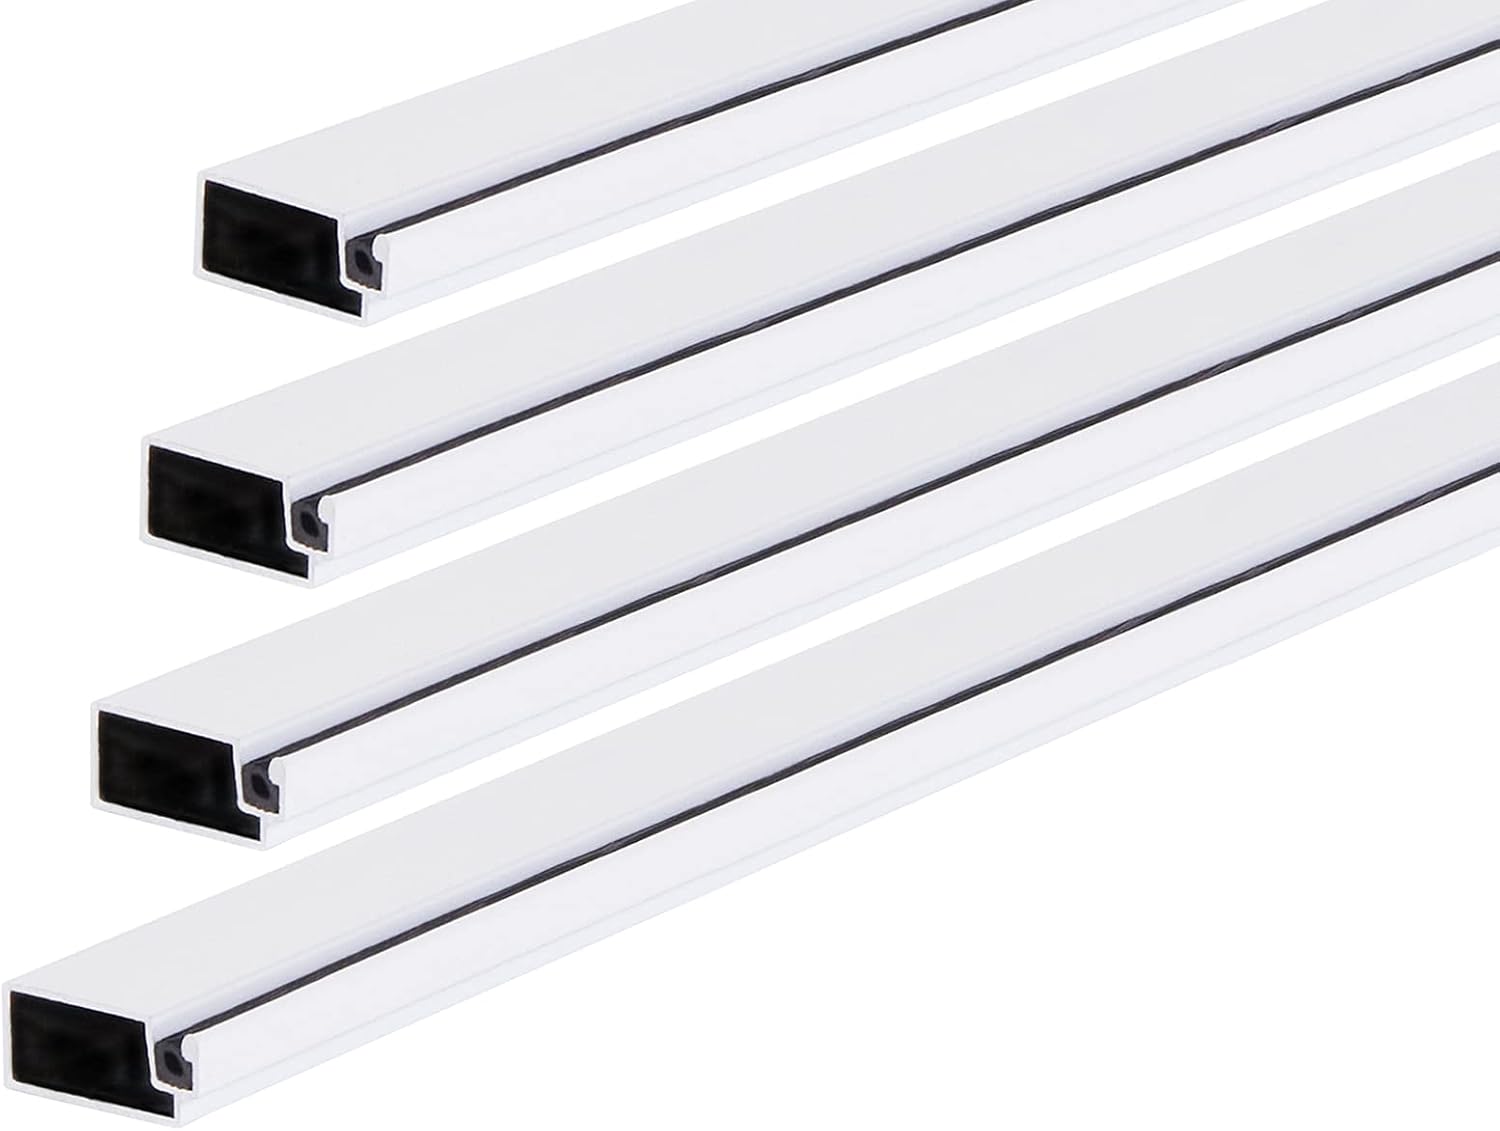
This kit gives you the core components to build a square, rust resistant screen frame at home. You get four 5/16 in aluminum frame pieces you can cut to size, plus frame corners, spline, pull tabs, and side tension springs for a snug, rattle-free fit. That means a DIY window screen replacement you can trust, using an aluminum screen frame kit in white that is designed for standard windows and sized to make one frame up to 48 in by 48 in.
Key Customer Benefits
- Stops bites without sprays, and restores the evening breeze. Public health guidance is simple: install and maintain window screens to keep mosquitoes outdoors. A well-fitted frame cuts indoor bites while you enjoy natural airflow and fewer chemical repellents.
- Sized for real windows, and easy to trim for a perfect fit. The kit builds one screen up to 48 by 48 inches, and the aluminum frame pieces are designed to be cut to your exact opening, so you are not forced into a one size guess.
- Stays straight, resists rust, and handles everyday use. Aluminum framing is a go-to for durability and weather resistance, which helps prevent warping and corrosion that can lead to gaps where pests get in.
- Snug, rattle-free install with the right hardware included. Corners, spline, pull tabs, and side tension springs come in the box, so you can assemble a tight, quiet screen that does not buzz in a cross-breeze. The manufacturer notes that different screen fabrics can require a different spline size, which is a helpful heads-up before you start.
- Standard 5/16 inch profile plays nicely with most screen tracks. This is the common frame thickness on many North American windows, which makes replacement and future re-screening straightforward.
- Better barrier, fewer “mystery bites.” When paired with a properly sized insect screen fabric, the frame lets you maintain the mesh size that vector control experts recommend for home use, which is typically sixteen to eighteen openings per inch to keep mosquitoes out.
- Built with lessons from the field. Aluminum frames hold their shape under spline tension better than many vinyl frames, which can bow when you try to pull a screen drum tight, so your finished panel is more likely to stay square and seal cleanly in the track.
Product Description
What this kit is
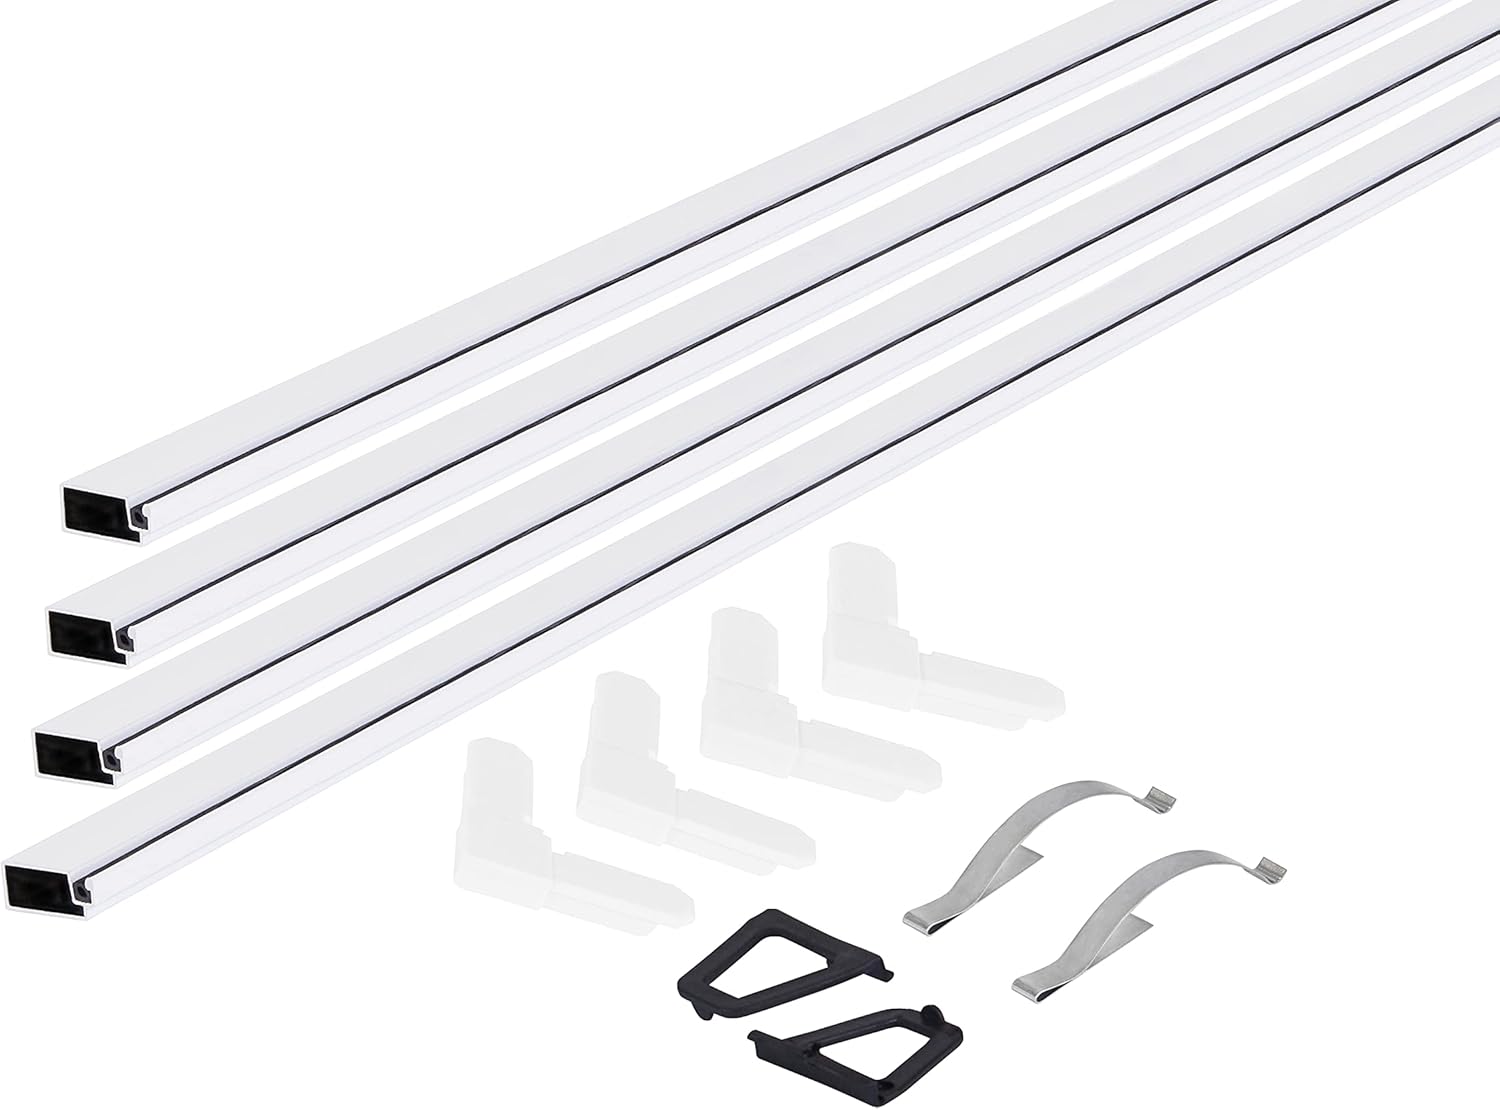
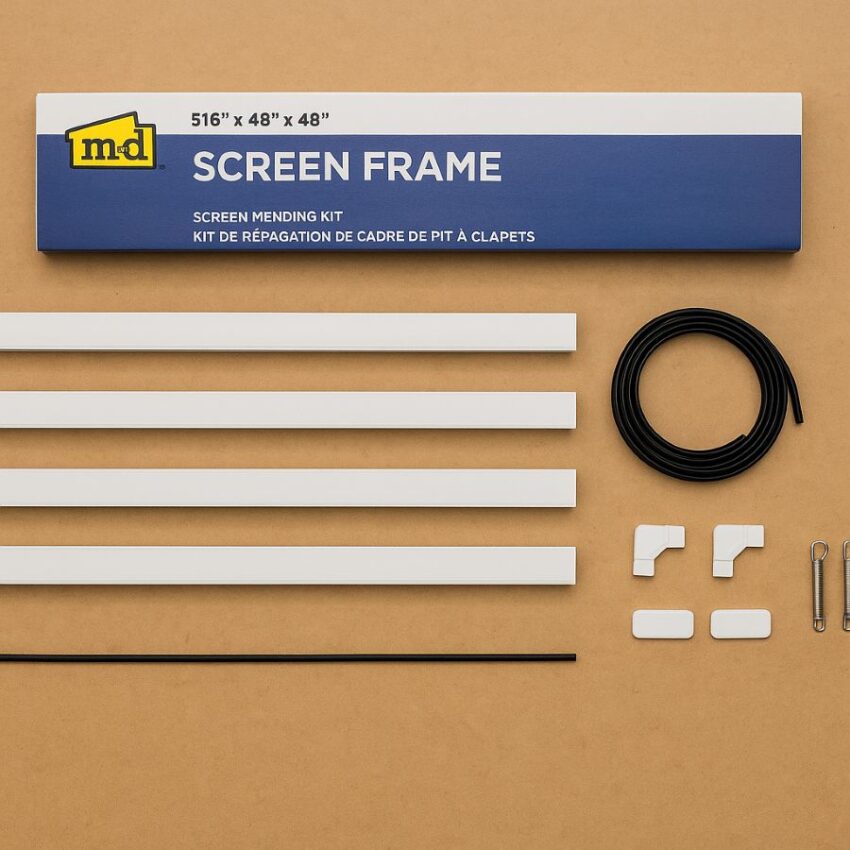
The M-D Building Products 14103 5/16 in. x 48 in. x 48 in. White Aluminum Screen Frame Kit is a complete, cut-to-fit framing system for building one square window screen up to forty-eight inches by forty-eight inches. In the box you will find four aluminum frame pieces, press-in corners, spline, pull tabs, and side tension springs, so you can assemble a rigid, rust-resistant frame that drops into most standard window tracks with a 5/16 inch profile. The manufacturer also notes that while a spline is included, some screen fabrics need a different spline diameter, so you should check the screen roll label before you start.
How it works in your window
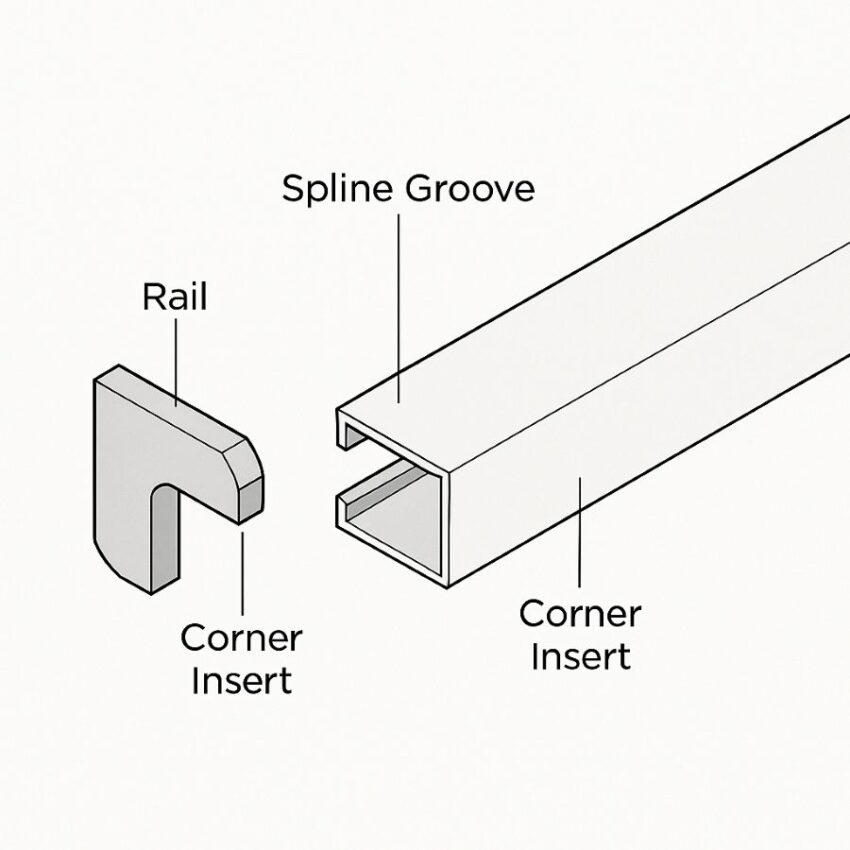
Once you cut the aluminum members to your measured sizes, the press-in corners square the frame and the side springs give the panel a gentle outward push that keeps it seated in the track. You lay your chosen screen fabric over the frame, then roll the spline into the groove to lock the mesh tight. That compression creates a smooth, drum-like surface and a clean perimeter seal that blocks the usual suspects such as mosquitoes and flies while letting air move. Public health guidance is straightforward on why this matters. Installing and maintaining window screens is one of the simplest ways to reduce indoor mosquito bites, especially in warm months when you want the windows open.
Why aluminum, and why 5/16 inch
Aluminum is a staple in screen framing because it resists rust, holds its shape under spline tension, and stays stable in heat and sun. That helps prevent the corner-to-corner bowing you can see with softer materials, which is a common cause of tiny daylight gaps around the edges. Experienced DIY installers also point out small fit details that extend the life of a screen, for example placing the spline on the interior side to shield it from weathering and ultraviolet exposure. The standard 5/16 inch thickness pairs with many North American residential window tracks, so replacements are usually straightforward.
What makes this kit different
Three things tend to make a project go smoothly, component fit, predictable sizing, and clear expectations about the mesh and spline. This kit checks those boxes. You get four full-length pieces that cut cleanly to size, hardware that matches the frame’s channel, and explicit guidance that mesh choice can change the correct spline size. That last point prevents a common pitfall where a too-large spline deforms the frame or rolls out under tension.
If you have very wide openings or windy exposures, builders sometimes add a center bar or temporary brace during screening to keep the panel square while you roll in the spline, then remove it after install. That field tip shows up often in pro and hobbyist discussions and it makes large panels come out flatter and tighter.
Product Specifications
| Spec | Detail |
|---|---|
| Model | M-D Building Products 14103 |
| Maximum finished frame size | Builds one screen frame up to 48 in by 48 in |
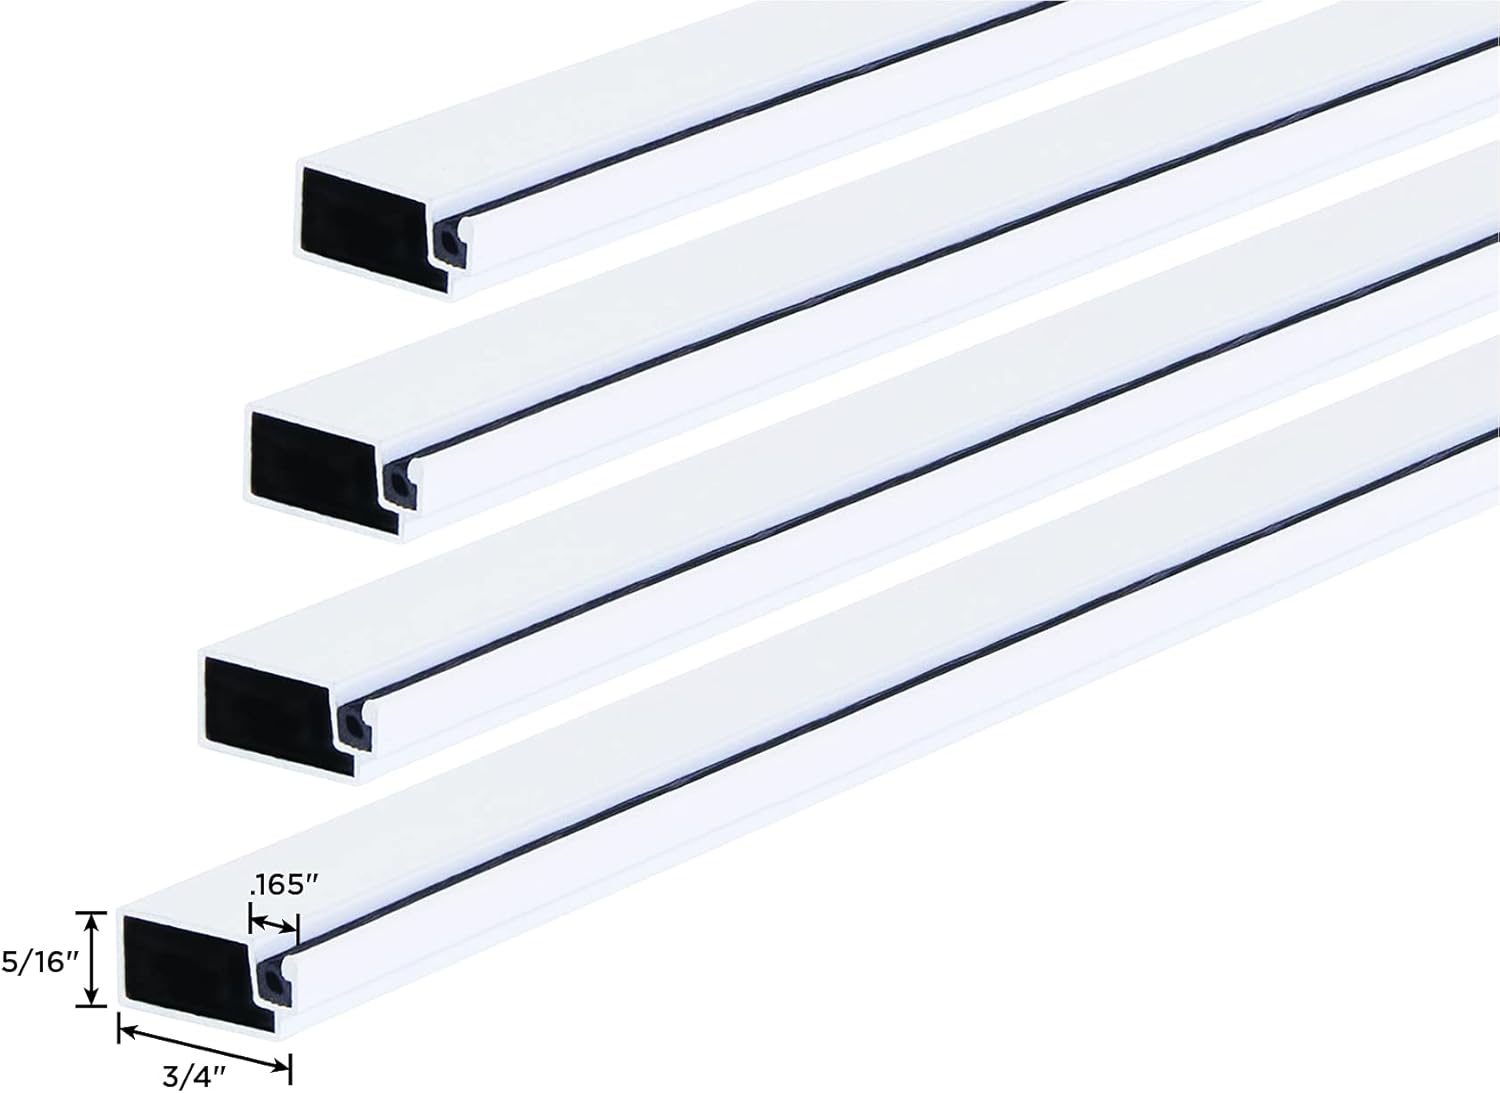
| Frame profile thickness | 5/16 in profile to fit most standard residential screen tracks |
| Material | Aluminum frame. Retailers list “aluminum and vinyl” because the kit also includes non-metal components such as spline and tabs |
| Finish color | White |
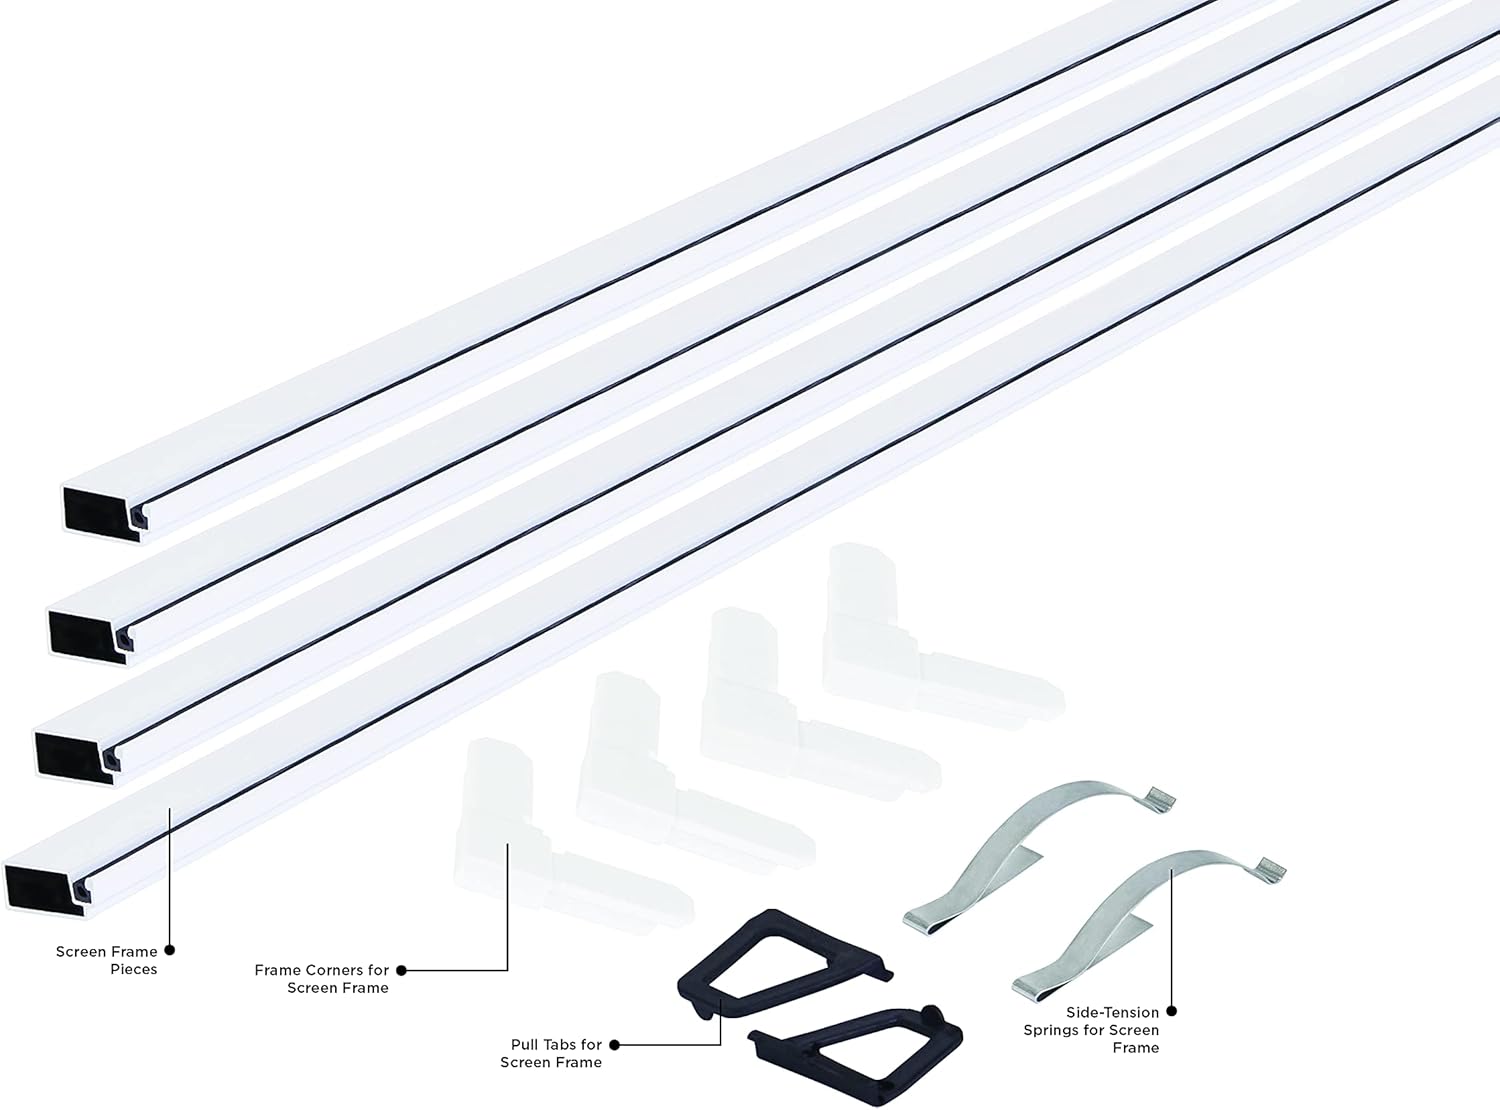
| Included components | Four 48 in aluminum frame pieces, press-in frame corners, spline, pull tabs, and side tension springs |
| UPC | 043374141030 |
| Typical use | Build or replace a screen frame for windows and also suitable for screen doors when size and track profile match |
| Cutting and tools | Frame pieces are cut to length with a hacksaw or metal snips. A spline roller makes installing mesh easier |
| Spline note | Spline is included. Some screen fabrics need a different spline diameter. Check the mesh roll’s packaging for the recommended size |
| Safety note | Some listings carry a California Prop 65 notice. Check local listing details if this applies to you |
| Manufacturer page | M-D product page for the 5/16 in aluminum screen frame kit, with contents and spline guidance |
How to Use and Installation Guide
Before you start
Lay everything out on a flat table. In the M-D Building Products 14103 5/16 in. x 48 in. x 48 in. White Aluminum Screen Frame Kit, you should have four aluminum frame pieces, four press-in corners, spline, two pull tabs, and two side tension springs. If your screen fabric did not come with a spline chart, look one up now, because different meshes use different spline diameters. The manufacturer says this plainly, and major screen makers back it up with sizing charts.
Tools that make the job easier: a tape measure, pencil, miter box and hacksaw or metal snips, a file to ease cut ends, a spline roller, and a small flat screwdriver for corners. If you plan to build a very tight panel, keep a temporary “brace” stick handy to hold the frame square while you roll in the mesh. That tip comes up often in DIY threads and pro forums.
Step 1: Measure the opening and plan the fit
Measure the inside width and height of the window’s screen track in two places each, then use the smaller dimension in each direction. Dry-fit the empty frame pieces in the opening to confirm that a 5/16 inch profile is correct for your window. If you are replacing an old screen, copy its outside dimensions. Screen kit instructions from big box retailers suggest subtracting space for the internal corners when you cut the rails, so read the insert for your kit or use the retailer guidance if your insert is missing.
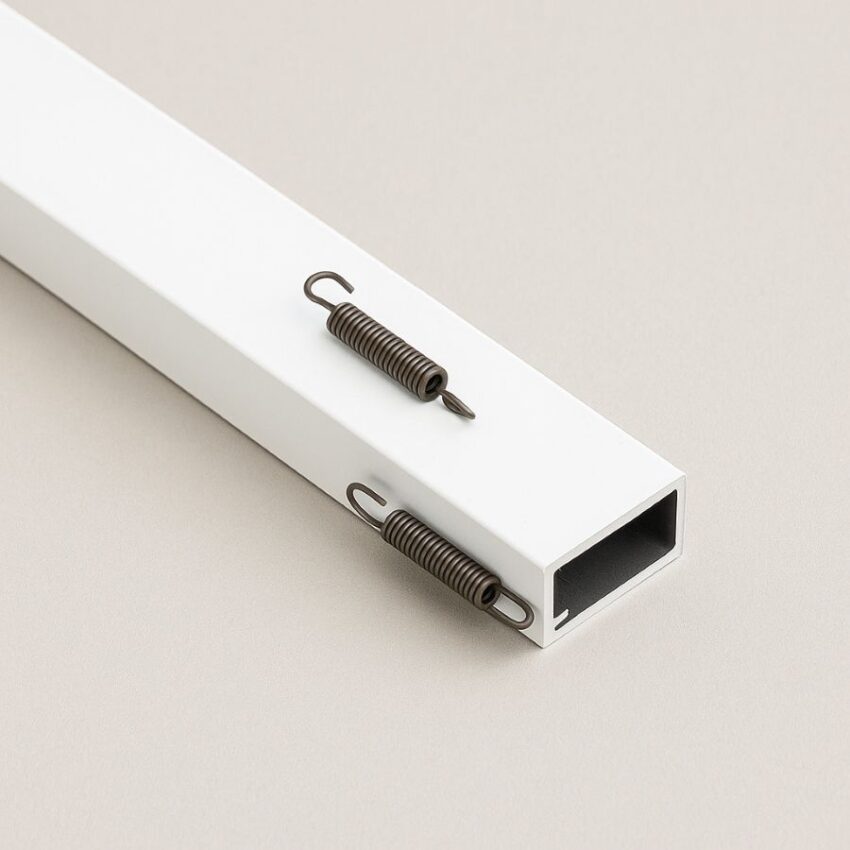
Why this matters: a tight-but-not-forced fit lets the side tension springs do their job. If the opening is out of square, split the difference so the finished frame seats without racking. For windows that rely on spring pressure, plan the springs on the side that sits in the deeper track. A how-to from a specialty retailer shows the typical placement of tension springs to hold the screen in the track.
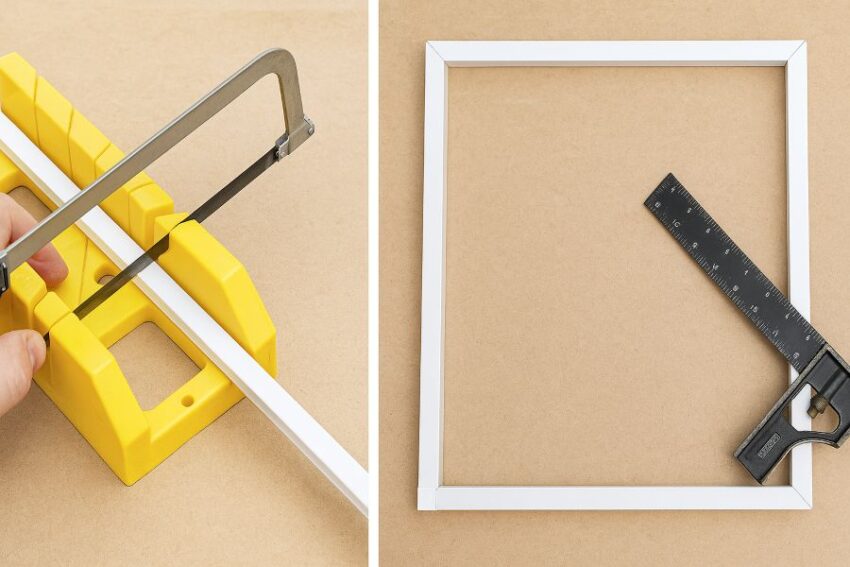
Step 2: Cut and square the frame
Mark your cut lines on the frame rails, then use a miter box and hacksaw for clean, square ends. Test the plastic or metal corners in the cut ends first; if the mouth is tight, kiss the inside edge with a file rather than forcing it. Press the corners fully home and build a rectangle on the table. M-D’s own how-to videos show this exact order: cut, corner-up, square, then add hardware.
Set the empty frame into the window to check fit. Add the two side tension springs in the side that will load into the deeper track. Many buyers miss this detail, and even note in reviews that generic inserts can be light on explanation, so do not skip a test fit before you screen it.
Step 3: Choose mesh and confirm spline size
Pick the screen fabric for your use case, then match the spline. Phifer’s chart is a good reference. It suggests about 0.140 inch spline for standard fiberglass in a common 5/16 by 3/4 frame, and 0.125 inch for aluminum insect screen. ADFORS echoes that guidance across its line, recommending 0.140 inch with most fiberglass styles and 0.125 inch with aluminum and pet-tough fabrics. Using the wrong diameter is the number one reason a screen rolls out or a frame bows.
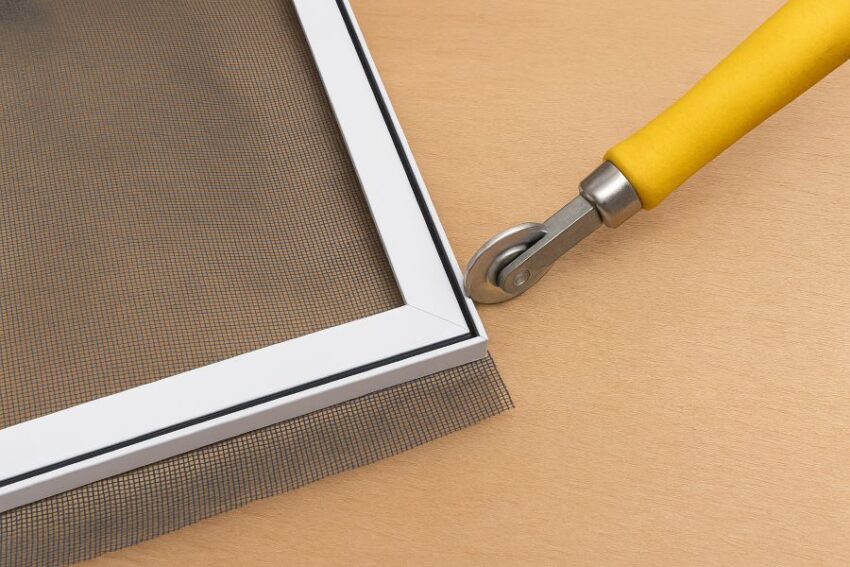
Step 4: Roll in the mesh without bowing the frame
Unroll the fabric over the frame with one to two inches of overhang on all sides. Tape the mesh at the top rail so it stays square. Start in the middle of the top rail and work toward the corners with the concave wheel of your spline tool. ADFORS’ printed instructions show starting at a corner, then working around while keeping the mesh straight and taut; either way works as long as you do not “tug” the long rails inward.
On wide frames, bowing is a real risk once you tension the long sides. Two field-tested tricks from pros and DIYers help:
- Temporary brace: cut a scrap stick a hair wider than the inside frame dimension, flex the frame slightly, and wedge it in the middle. After the mesh and spline are set, remove the brace and the rails relax to straight.
- Counter-bow method: pre-bow the long rails outward just a little before rolling the spline. As the spline pulls tension, the rail returns to straight rather than “hourglassing.” Be gentle so you do not crease the aluminum.
When you reach corners, press the spline deep with a flat screwdriver so the mesh is locked. Trim excess mesh with a fresh utility blade held flat to the outer face of the frame.
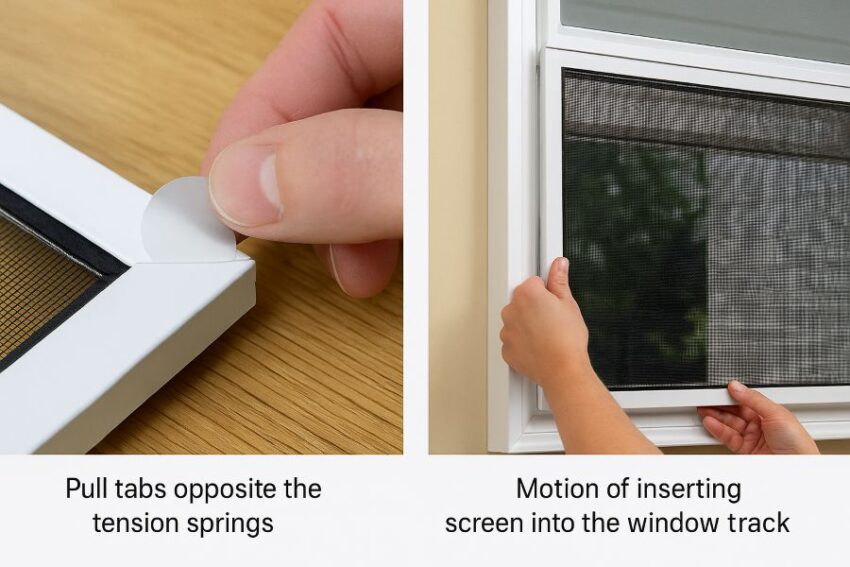
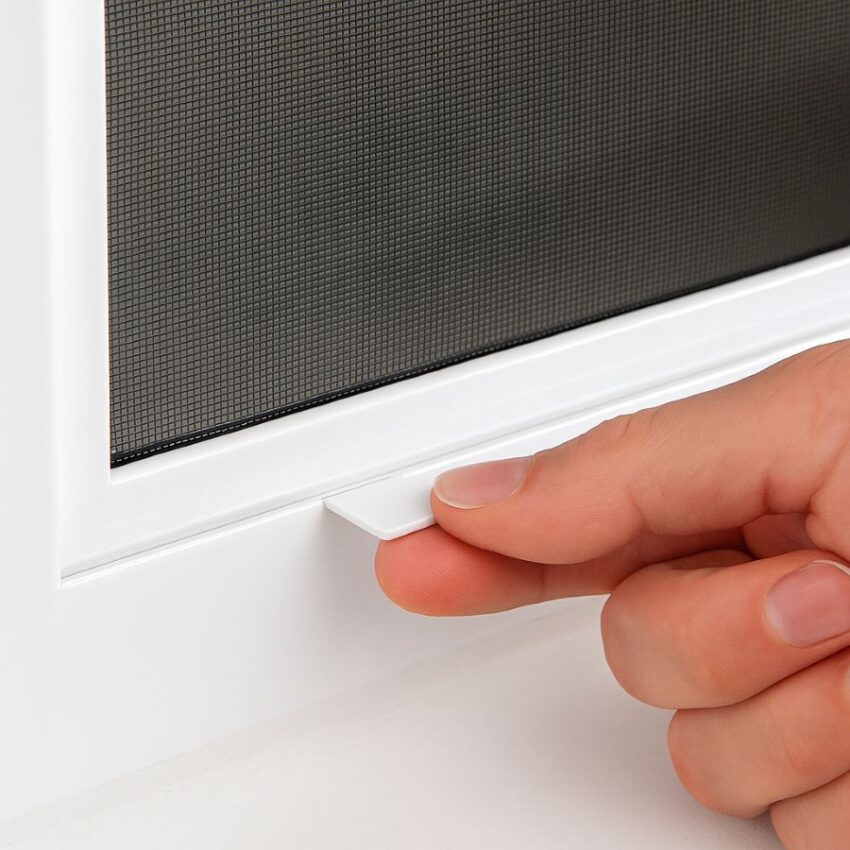
Step 5: Add pull tabs, finish hardware, and test
Set the two pull tabs on the opposite side from the springs so you can lift the screen out for cleaning. Place the frame back into the window by loading the spring side first, compressing into the track, then lowering the opposite edge until it clicks into place.
Check for daylight around the perimeter. If you see a thin gap at a corner, pop that side out and re-seat the spline within one inch of the corner to tighten the fabric. If the frame rattles, confirm that the springs are on the correct side and that the frame is not undersized more than a sliver.
Common Issues
- Bowed “hourglass” sides: re-roll one long side with less pull, or use the counter-bow method described above.
- Spline keeps popping out: check that your spline diameter matches the mesh and channel. Foam spline is more forgiving if your hands are new to the task.
- Frame is tight on one corner but loose on the other: your opening is out of square. Split the difference and rely on the springs to hold the panel. If the screen is very large, consider adding a center bar when you rebuild.
Safety and care
Wear eye protection when cutting aluminum. Deburr cut ends so corners seat fully. Keep hands clear of the roller wheel. Store spare spline in a bag out of direct sun since ultraviolet light hardens many elastomers over time, which can lead to future roll-out. M-D’s own site lists accessory parts like corners and spline if you ever need to re-screen later.
What success looks like
A good screen sits flush in the track, needs only a fingertip to pull out using the tabs, and shows a smooth “drum head” surface when you tap it lightly. If you can see stars through the frame at night with the lights on inside and no light seeping around the edges, you have done it right. For most homes, that simple barrier cuts indoor mosquitoes dramatically while letting you keep the windows open more often.
Frequently Asked Questions
Does this kit include the screen mesh or do I buy that separately?
Screen fabric is sold separately. The M-D product page and multiple retailer listings spell out what comes in the box: four cut-to-fit aluminum rails, press-in corners, spline, pull tabs, and side tension springs. None of those pages list mesh as included, and comparable frame kits from big-box stores explicitly say “insect screen not included.
What size spline should I use with fiberglass versus aluminum screen?
Use the mesh maker’s chart as your north star. Guidance is clear: match spline diameter to the groove width for standard fiberglass or aluminum, and drop one size smaller for thicker fabrics like PetScreen, SunTex, or heavy solar meshes. In practice, many 5/16 by 3/4 frames with standard fiberglass land around 0.140 inch spline, while aluminum often uses 0.125 inch. Always check your groove with calipers or test pieces.
Will the 5/16 inch frame fit my window track?
Five-sixteenths is a common residential screen profile in North America, and the M-D 14103 kit is designed for that track size. If you’re unsure, dry-fit an un-screened frame first or compare to a known 5/16 inch screen at the store. This kit is specifically listed as a 5/16 inch frame kit that builds one screen up to 48 by 48 inches.
What actually comes in the M-D 14103 box?
Four aluminum frame pieces, inside corners, spline, two pull tabs, and two side tension springs. Listings note that while spline is included, a different diameter may be needed depending on the mesh you choose.
How do the side tension springs work and where do they go?
They sit on the side that loads into the deeper channel of your window track. You compress the spring edge into the deep track, then pivot the opposite edge down until it clicks in.
My opening is wide. Do I need a crossbar so the screen doesn’t sag?
For screens larger than roughly 45 to 48 inches in width or height, a crossbar is recommended. A mid-rail keeps the frame square and the mesh taut in wind and heat. DIY threads echo the same advice for very large panels.
The long sides bow inward after I roll the spline. How can I stop that?
Two field fixes show up again and again:
- wedge a temporary brace stick inside the empty frame before you spline, then remove it when you’re done, or
- pre-bow the long rails slightly outward so tension pulls them back to straight.
Both methods are taught in forum guides and shop tutorials.
Which mesh keeps out tiny “no-see-ums,” and will it work with this frame?
Yes. Choose a 20×20 “no-see-um” fiberglass or an aluminum “tiny insect” mesh. Because these fabrics are thicker than standard fiberglass, use a smaller spline than usual so it seats correctly in the groove.
Can I use this 5/16 inch kit for a small storm-door screen?
It can work if the door’s track is designed for a 5/16 inch frame and the finished size stays within 48 by 48 inches. Retailers describe the kit as suitable for windows and for new or replacement screens where track profile and dimensions match. Verify your door track thickness before you cut.
What tools do I need to build one screen from this kit?
A tape measure, pencil, miter box with hacksaw or metal snips, a file for burrs, and a spline roller. Many tutorials add a flat screwdriver for pushing spline deep in the corners.
Is there a Prop 65 warning on these parts?
Some retailer listings flag California Proposition 65 notices for screen components. If you’re in California or buying for a job there, review the specific listing or package labeling for the most accurate notice.
What if I don’t want to DIY at all, how much do finished screens usually cost?
Local shops can build custom screens surprisingly affordably. In homeowner threads, people report quotes in the ballpark of 30 US dollars per screen for basic sizes, with extras for specialty mesh or colors. Prices vary by city and season, but it’s a useful benchmark if you decide to outsource.
Where can I verify the exact model and UPC for the M-D 14103 kit?
Several dealer listings publish the model and barcode: M-D 14103 with UPC 043374141030 appears consistently across independent retailer catalogs. Cross-check with the M-D product page for contents and sizing.
Conclusion
If you are tired of losing the evening breeze to mosquitoes, a well built screen is one of the simplest fixes you can make. Public health guidance is unambiguous. Keep mosquitoes outside by using and repairing window and door screens, which immediately cuts indoor bites without relying on constant sprays.
The M-D Building Products 14103 5/16 in. x 48 in. x 48 in. White Aluminum Screen Frame Kit gives you the right foundation for a clean, square, and durable panel. You get cut-to-fit aluminum rails, corners, spline, pull tabs, and side tension springs, with a clear note to match spline size to your chosen mesh for a tight seal. That combination is why this kit is a reliable choice for DIY window screen replacement and for fresh installs where a 5/16 inch aluminum screen frame fits the track.
Here is my practical recommendation as a pest control pro. Measure once carefully, dry fit the empty frame, then screen it with the correct spline so your panel sits snug and quiet in the track. If your opening is very wide, plan a mid-brace during screening to keep the rails straight. The result is a crisp mesh surface, no daylight at the edges, and a solid barrier that lets you open windows more often. That simple structural step aligns with CDC and EPA advice to pair screens with smart habits like emptying standing water.
Reviews
There are no reviews yet.